How to use MDX
General usage
You can use the pnpm run dev command to see your changes live on your local machine. We highly recommend it to see how your changes look like in the browser.
To use a module documented here you have to import the module file and after that you can use it in md/mdx. The import must be located below the --- and there must be a blank line after it.
Please run pnpm run build after you added new content to the documentation to make sure that your changes work as expected. Please branch out from main and create a pull request for your changes. We have a develop branch that we use for staging and testing. It will automatically deploy to the staging environment at https://staging.diditchecklist.com. Again, only commits that pass the build process with pnpm run build will be visible on staging.
Call to action (CTA) - Components
Contact form
import ContactForm from '@components/ContactForm.astro';

<ContactForm />
Schedule a call with us via Calendly or provide your email address, and we'll get in touch with you.

Dominic Spike
Didit Product Owner
Button / CTA
import Button from '@components/react/md/Button';

<Button link='https://seibert.biz/checklistschat'>Chat with us about this</Button>Download Banner
Displays a download banner. Choose “jira” or “confluence” as product to set the specific AMP download link.
import DownloadBanner from '@components/DownloadBanner.astro';

<DownloadBanner product='jira'></DownloadBanner>
Testimonal
Displays a customer testimonial with optional 4-star-rating and name.
import Testimonial from '@components/react/md/Testimoninal.tsx';

<Testimonial name="Petra Winter" rating="4">Awesome app an great suppport! Lovin' it!</Testimonial>
Carousel / Slider
Displays a content carousel. You can also add and authur and a fix 4-star rating to use the component as a testimnonial slider.
import Carousel from '@components/Carousel.astro';
import CarouselItem from '@components/CarouselItem.astro';


<Carousel>
  <CarouselItem author="Petra Winter" rating>
    Lorem ipsum dolor sit amet, consetetur sadipscing elitr, sed diam nonumy eirmod tempor invidunt ut labore et dolore magna aliquyam erat, sed diam voluptua. At vero eos et accusam et justo duo dolores et ea rebum. Stet clita kasd gubergren, no sea takimata sanctus est Lorem ipsum dolor sit amet.
  </CarouselItem>

  <CarouselItem author="John Snow" >
    Lorem ipsum dolor sit amet, consetetur sadipscing elitr, sed diam nonumy eirmod tempor invidunt ut labore et dolore magna aliquyam erat, sed diam voluptua. At vero eos et accusam et justo duo dolores et ea rebum.
  </CarouselItem>

  <CarouselItem author="Bilbo Baggins" >
    Lorem ipsum dolor sit amet, consetetur sadipscing elitr, sed diam nonumy eirmod tempor invidunt ut labore et dolore magna aliquyam erat, sed diam voluptua. At vero eos et accusam et justo duo dolores et ea rebum. Stet clita kasd gubergren, no sea takimata sanctus est Lorem ipsum dolor sit amet. Lorem ipsum dolor sit amet, consetetur sadipscing elitr, sed diam nonumy eirmod tempor invidunt ut labore et dolore magna aliquyam erat, sed diam voluptua.
  </CarouselItem>
</Carousel>Hero
Displays a hero section with a title, an image and Content. The content can be any MD. Image must be located in /src/assets/images. Provide the exact image name without the path.
import Hero from '@components/Hero.astro';
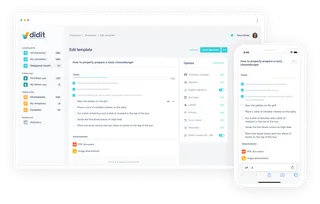
<Hero title='🚀 This is a hero' image='didit-interface.png'>
This component is designed to capture the user’s attention immediately upon visiting a website. It typically features a visually striking image, conveying a
key message or central theme. This component helps reinforce branding and creates a strong first impression.
</Hero>🚀 This is a hero
This component is designed to capture the user’s attention immediately upon visiting a website. It typically features a visually striking image, conveying a key message or central theme. This component helps reinforce branding and creates a strong first impression.
Document list
You can list the content of the current directory (leave the path empty) or a specific directory providing the path parameter like “/en/guides”
import DocList from '@components/DocList.astro';

<DocList path='/en/guides' label='All the guides'></DocList>Hint
import Hint from '@components/react/md/Hint';

<Hint title={'This is a hint'}>This component provides an hint visual hint text</Hint>This is a hint
Panel
import Panel from "@components/react/md/Panel";

<Panel title={"Info title"} paneltype="info">
    Use this panel for general informational messages. For providing hints to users, consider using the ‘hint’ component.
</Panel>

<Panel title={"Success title"} paneltype="success">
    Use this panel for success messages
</Panel>

<Panel title={"Warning title"} paneltype="warning">
    Use this panel for warning messages
</Panel>

<Panel title={"Error title"} paneltype="alert">
    Use this panel for error messages
</Panel>
Info title
Use this panel for general informational messages. For providing hints to users, consider using the ‘hint’ component.
Success title
Use this panel for success messages
Warning title
Use this panel for warning messages
Error title
Use this panel for error messages
FAQ accordion
import Faq from "@components/Faq.astro";

<Faq title="That's a title" >Some description. All mdx markup and compoments can be used in here.</Faq>
<Faq title="That's a title" >Some description</Faq>
<Faq title="That's a title" >Some description</Faq>ContentImage - Openable astro image
This component provides an easy to use image component without the need of prividing a path. The image must be located in ‘/src/assets/images/’ and added to the repository.
Parameters
bold parameters are mandatory.
| Parameter | Meaning | Values | Default |
|---|---|---|---|
| src | Provide the image name itself. Image must be located in /src/assets/images. Provide the exact image name without the path. | filename in /src/assets/images | - |
| alt | Alt text for the image. | string does a | - |
| size | Size of the preview image | s, m, l, full | full |
| align | Alignment of the image | left, center, right | center |
| noborder | Set no border to the image | ||
| nomodal | by default the image will be clickable. The click will open a modal displaying the image in higher quality. |
By default, all images open a larger version of themselves in a modal when clicked. To disable this, set the “nomodal” attribute.
import ContentImage from "@components/ContentImage.astro";

<ContentImage src="image-1.jpg" alt="Image explanation"  size="s" align="left"/>
<ContentImage src="image-1.jpg" alt="Image explanation"  size="m" align="center"/>
<ContentImage src="image-1.jpg" alt="Image explanation"  size='xl' align="right"/>
<ContentImage src="image-1.jpg" alt="Image explanation"  size="full" align="left" nomodal noborder/>


Grid
Can be used for any single parent content type like cards or images. The column count can be defined by the columns attribute. You can also define the gap between the grid items and the vertical margin to other items with “xs, s, m, l, xl”. You can use a tags for a line on the top right in orange.
import Grid from "@components/react/md/Grid";
import ContentImage from "@components/ContentImage.astro";
import Card from "@components/Card.astro";

<Grid columns={3} gap="s" margin="m">
    <ContentImage src="image-1.jpg" alt="Image explanation"   size="s" align="left" />
    <ContentImage src="image-1.jpg" alt="Image explanation"   size="s" align="left"/>
    <ContentImage src="image-1.jpg" alt="Image explanation"   size="s" align="left"/>
</Grid>

-----

<Grid columns={3} gap="s" margin="m">
    <Card title="Visit our marketplae" link="https://google.com">
        Our experts are here to guide you through every feature and answer all your questions. Don't miss out on this opportunity to supercharge your productivity.
    </Card>
    <Card title="Visit our marketplae" link="https://google.com" tag="Software development">
        Our experts are here to guide you through every feature and answer all your questions. Don't miss out on this opportunity to supercharge your productivity.
    </Card>
    <Card title="Visit our marketplae" link="https://google.com">
        Our experts are here to guide you through every feature and answer all your questions. Don't miss out on this opportunity to supercharge your productivity.
    </Card>
</Grid>
Grid example with images:
Grid example with cards:
Visit our marketplae
Our experts are here to guide you through every feature and answer all your questions. Don’t miss out on this opportunity to supercharge your productivity.
Read moreVisit our marketplae
Our experts are here to guide you through every feature and answer all your questions. Don’t miss out on this opportunity to supercharge your productivity.
Read moreVisit our marketplae
Our experts are here to guide you through every feature and answer all your questions. Don’t miss out on this opportunity to supercharge your productivity.
Read moreParameters
bold parameters are mandatory.
| Parameter | Meaning | Values | Default |
|---|---|---|---|
| colums | Number of columns to display side by side | - | |
| gap | Gap displayed between the columns | xs, s, m, l, xl | s |
| margin | Margin of the columns | xs, s, m, l, xl | s |
Card
A clickable image & text card
import Card from "@components/Card.astro";

<Card title="Visit our marketplace" link="https://google.com" image="image-1.jpg" buttonText="Find out" size="s" tag="Software development">
	Our experts are here to guide you through every feature and answer all your questions. Don't miss out on this opportunity to supercharge your productivity.
</Card>

<Card title="Visit our marketplace" link="https://google.com" image="image-1.jpg" buttonText="Find out" size="m" tag="Finance">
	Our experts are here to guide you through every feature and answer all your questions. Don't miss out on this opportunity to supercharge your productivity.
</Card>


<Card title="Visit our marketplae" link="https://google.com" image="image-2.jpg" size='xl'>
    Our experts are here to guide you through every feature and answer all your questions. Don't miss out on this opportunity to supercharge your productivity.
</Card>

<Card title="Visit our marketplae" link="https://google.com" image="image-1.jpg" size="full">
	Our experts are here to guide you through every feature and answer all your questions. Don't miss out on this opportunity to supercharge your productivity.
</Card>
Visit our marketplace
Our experts are here to guide you through every feature and answer all your questions. Don’t miss out on this opportunity to supercharge your productivity.
Find out
Visit our marketplace
Our experts are here to guide you through every feature and answer all your questions. Don’t miss out on this opportunity to supercharge your productivity.
Find out
Visit our marketplae
Our experts are here to guide you through every feature and answer all your questions. Don’t miss out on this opportunity to supercharge your productivity.
Read more
Visit our marketplae
Our experts are here to guide you through every feature and answer all your questions. Don’t miss out on this opportunity to supercharge your productivity.
Read moreAllowed attributes:
| Parameter | type | value | default |
|---|---|---|---|
| title | string | Title line of the card | |
| link | string | a link the button and image will lead to | |
| image | string | image used in the header of the card. Provide just the filename of the image from /src/assets/images | |
| buttonText | string | Text to display on the button | |
| size | string | ’s’, ‘m’, ‘l’ or ‘full’. Default is ‘m’ |
Attributes marked without ”?” are mandatory.
The text of the card can be placed between the <Card></Card> tags.
Badge
import Badge from "@components/react/md/Badge";

<Badge label="Badge" />
<Badge label="blue" color="blue"/>
<Badge label="red" color="red"/>
<Badge label="grey" color="grey"/>
<Badge label="green" color="green"/>
<Badge label="yellow" color="yellow"/>
<Badge label="indigo" color="indigo"/>
<Badge label="purple" color="purple"/>
<Badge label="pink" color="pink"/>

<Badge label="Badge" border/>
<Badge label="blue" color="blue" border/>
<Badge label="red" color="red" border/>
<Badge label="grey" color="grey" border/>
<Badge label="green" color="green" border/>
<Badge label="yellow" color="yellow" border/>
<Badge label="indigo" color="indigo" border/>
<Badge label="purple" color="purple" border/>
<Badge label="pink" color="pink" border/>
Badge blue red grey green yellow indigo purple pink
Allowed attributes:
| Parameter | type | value | default |
|---|---|---|---|
| label | string | Text on the Badge | - |
| color | string | ’red’, ‘blue’, ‘grey’, ‘green’, ‘yellow’, ‘indigo’, ‘purple’, ‘pink’ | - |
| border | boolean |
Attributes marked without ”?” are mandatory.
Steps
Use this module to display multiple steps the user has to take in the documentation. Please use a headline 4 (h4 / ####) for the titles and indent the description text with three spaces so that the layout does not break.
import Steps from '@components/react/md/Steps';

<Steps>
    1. #### First step as a markup header is possible You can also add some text here. Markup is possible here as well.
    2. #### Second step
       Some text here.
    3. #### Third step
       Description text
    4. #### Fourth step
</Steps>
Look out for indentation
Please understand that the description text must be indented with three spaces so that the layout does not break. The code above does not show the correct indentation.
-
First step as a markup header is possible You can also add some text here. Markup is possible here as well.
-
Second step
Some text here. -
Third step
Description text -
Fourth step
Text formatting & Emphasis
**Bold text**

_Italic text_

~~Strikethrough text~~
Bold text
Italic text
Strikethrough text
Text Highlighting
import Textmarker from "@components/Textmarker.astro";

This is some <Textmarker color="orange">highlighted</Textmarker> text

This is some <Textmarker color="green">highlighted</Textmarker> text

# This is a <Textmarker underlined>highlighted</Textmarker> headline
This is some highlighted text
This is some highlighted text
This is a highlighted headline
Heading Levels
# H1 Heading

## H2 Heading

### H3 Heading

#### H4 Heading

##### H5 Heading

###### H6 Heading
H1 Heading
H2 Heading
H3 Heading
H4 Heading
H5 Heading
H6 Heading
Aligner
Align text left, center or right position.
import Aligner from '@components/Aligner.astro';

<Aligner align={'center'}># This ia a centered headline</Aligner>;Lists
Unordered List:

- Item 1
- Item 2
  - Sub-item 1
  - Sub-item 2
- Item 3

Ordered List:

1. First item
2. Second item
   1. Sub-item 1
   2. Sub-item 2
3. Third item
Unordered List:
- Item 1
- Item 2
- Sub-item 1 (use tabs for nesting)
- Sub-item 2 (use tabs for nesting)
- Item 3
Ordered List:
- First item
- Second item
- Sub-item 1 (use tabs for nesting)
- Sub-item 2 (use tabs for nesting)
- Third item
Use tabs for nesting
To create nested lists you need to tab the rows of the nested items. The code above does not show the correct tabs.
Links
[Link to OpenAI](https://www.openai.com)YouTube - Video Embed
import { YouTube } from 'astro-embed';

<YouTube id='dyB2ivHsysE' title='Learn Didit Checklists with our ultimate deep dive' />Blockquotes
A blockquotes
> This is a blockquote.This is a blockquote.
Tables
| Column 1 | Column 2 | Column 3 |
| -------- | -------- | -------- |
| Row 1    | Data 1   | Data 2   |
| Row 2 | Data 3 | Data 4 || Column 1 | Column 2 | Column 3 |
|---|---|---|
| Row 1 | Data 1 | Data 2 |
| Row 2 | Data 3 | Data 4 |
Horizontal Rule
---Task Lists
- [x] Task 1
- [ ] Task 2
- [ ] Task 3- Task 1
- Task 2
- Task 3
HTML
<pre>
<p>This is a paragraph in HTML</p>
</pre>
This is a paragraph in HTML
Logo carousel
import LogoCarousel from '@components/LogoCarousel.astro';

<LogoCarousel />;
Images for cards and pages
Copy the filenames and use them in the components “ContentImage”, “Cards”, “Hero” and others.


PDF Icon for PDF files
- You can choose a size for the PDF icon by adding the size (s, m, l) attribute. The default size is m with 48px.
- You can either choose a link or a file name for the PDF file. Please make sure to add the file to “/src/assets/pdfs”.
- All attributes are optional. But you should at least provide a file or link. Otherwise, the linkgit pull will not work.
import PDFIcon from '@components/PDFIcon.astro';

<PDFIcon file="sample-pdf.pdf" alt="Download PDF about Seibert Group name change." />

<PDFIcon link="https://seibert.biz/linktorandompdffile" size="xs"/>
Footnotes
This is a sentence with a footnote.1
Footnotes
-
This is the footnote. ↩