How to set default checklists per project
You can set a default checklist per issue type in each Jira project. This allows you to automatically generate a new checklist from a template every time users create a certain issue type. This is a great way to ensure doers follow a certain order of steps to perform a task.
Any project automations that trigger on “Issue created,” will override the default checklist settings. This is because automation acts after the issue is created.
-
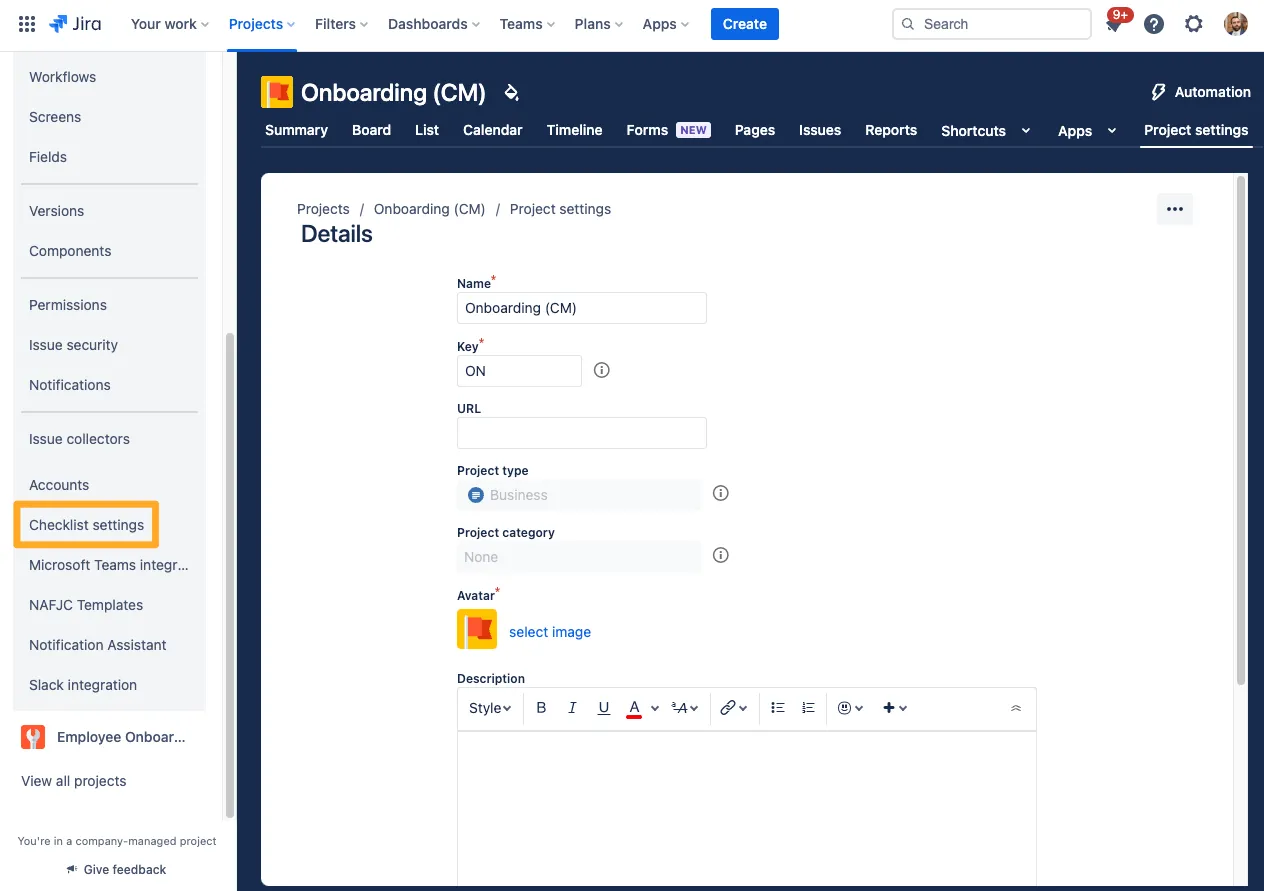
Navigate to your project settings.
This can vary depending on your project type. The permission required to access these settings is “Administer Projects” in company-managed projects and the “Administrator” role in team-managed projects. The below screenshot is from a company-managed software project, the location of settings will also vary depending on business or software project types.
-
Choose “Checklist settings” in the left sidebar.

-
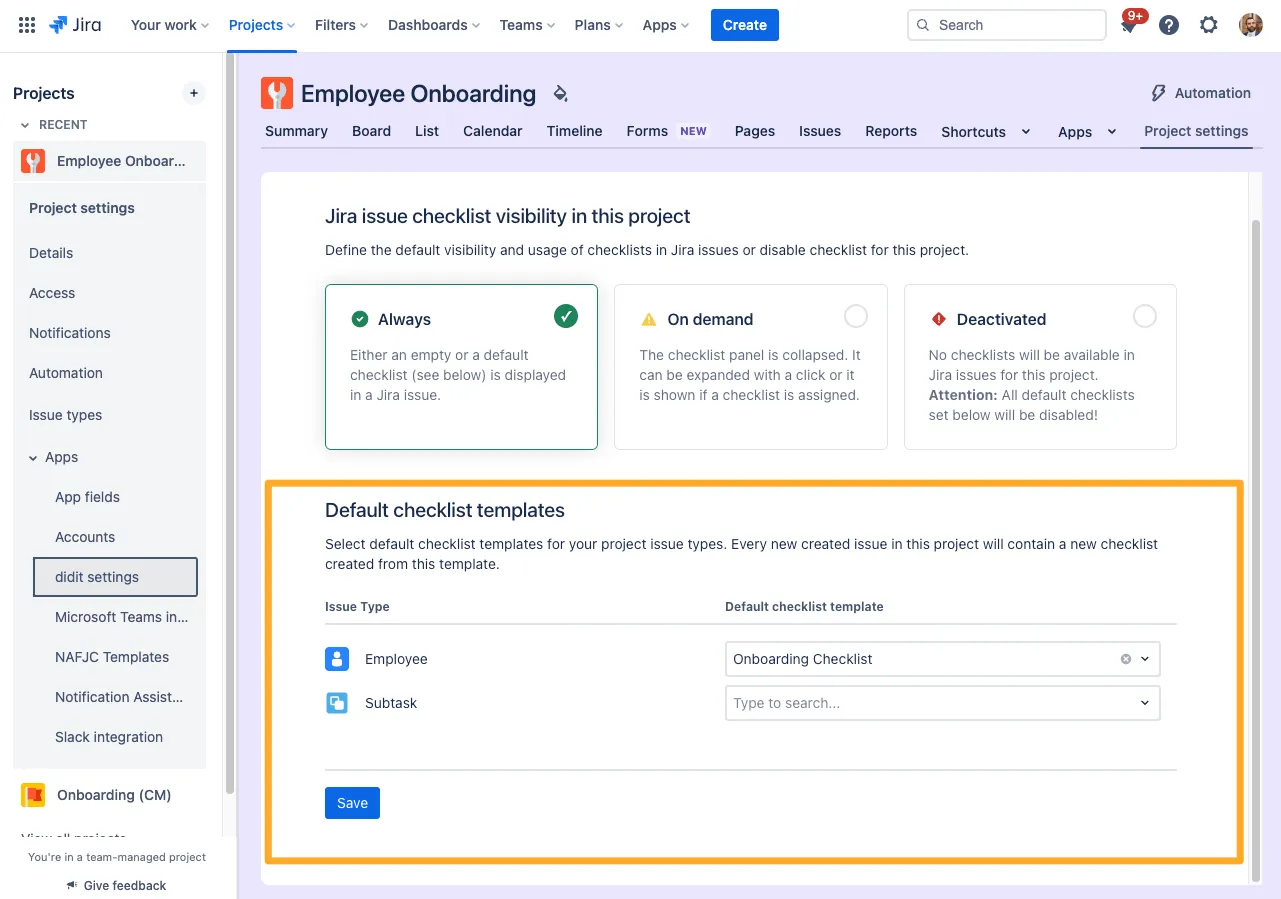
Choose a checklist template for each issue type in your project for which you would like to generate a new checklist each time a user creates an issue of that type.

-
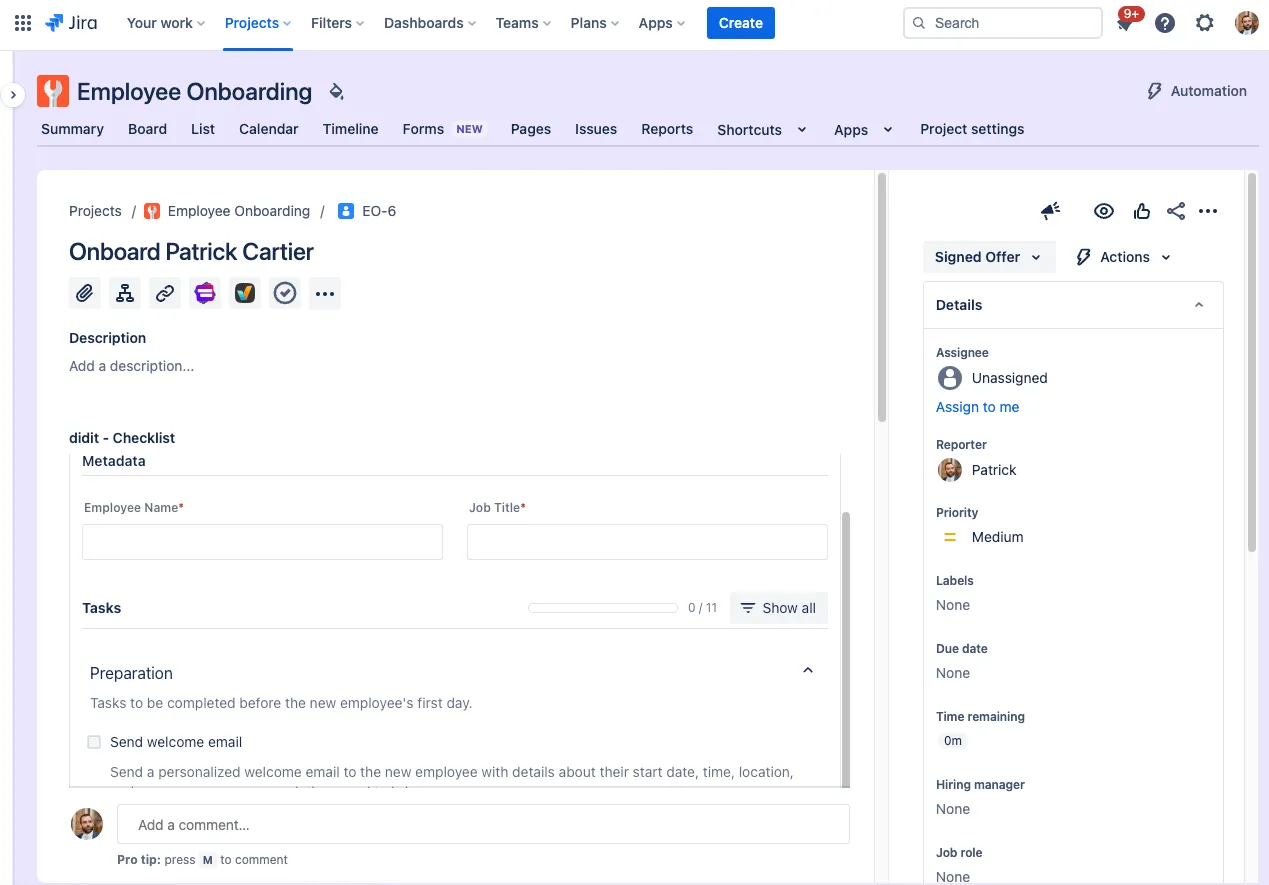
When you create a new issue of the specified type, the checklist will appear automatically.

Link to this page: https://seibert.biz/didithowtosetdefaultchecklist