How to migrate individual checklists from Checklists for Jira
Initial preparation
If you haven’t already, be sure to check out our initial preparation steps before starting the individual migration process.
We assume in this documentation that you’re using one of the three versions of Checklists for Jira and only have limited data. This can be Checklists for Jira (Free), Checklists for Jira (Pro), or Checklists for Jira (Enterprise). If you have a lot of data, check out our global migration feature.
If you find yourself here, you are probably ready to migrate some of your Checklists for Jira checklists to Didit checklists. If you want to migrate all of your checklist data, you can check the link mentioned above. This method works best for teams who want to only migrate a few checklists. This could be one project or even one issue type in Jira. Having more control over which checklists you migrate allows you to validate the migration immediately after initiating it. It also allows you to control which data gets imported to Didit, lessening the load on the system.
Migration Method 1 (Preferred)
-
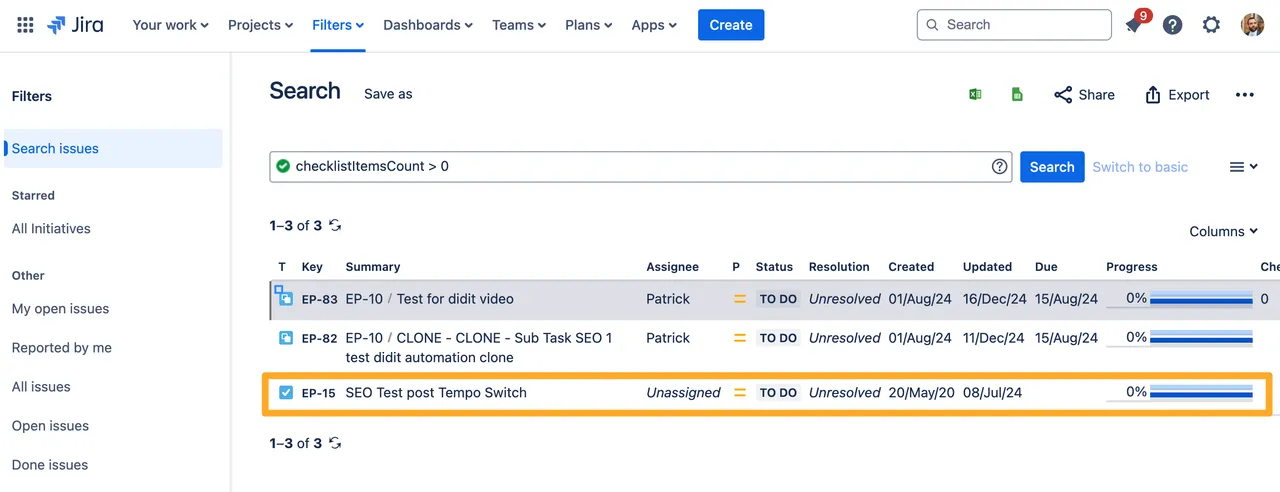
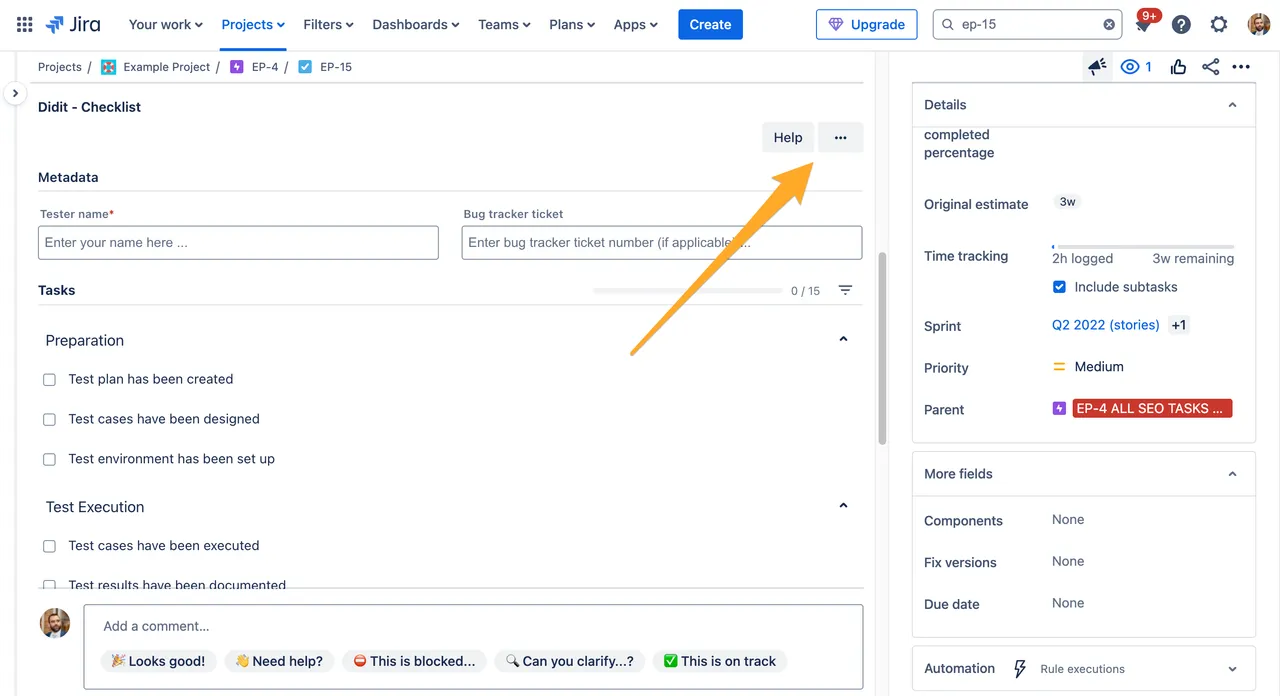
Navigate to the issue where you would like to copy the checklist.

-
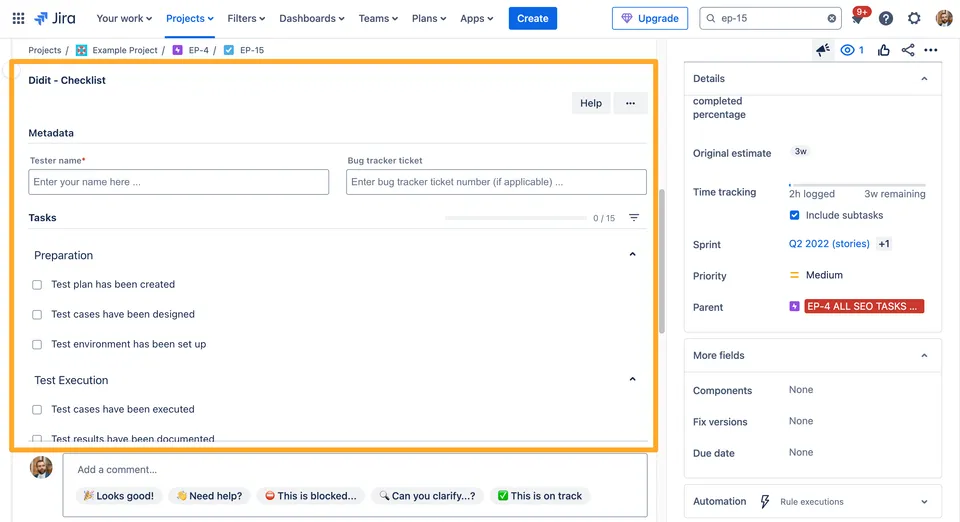
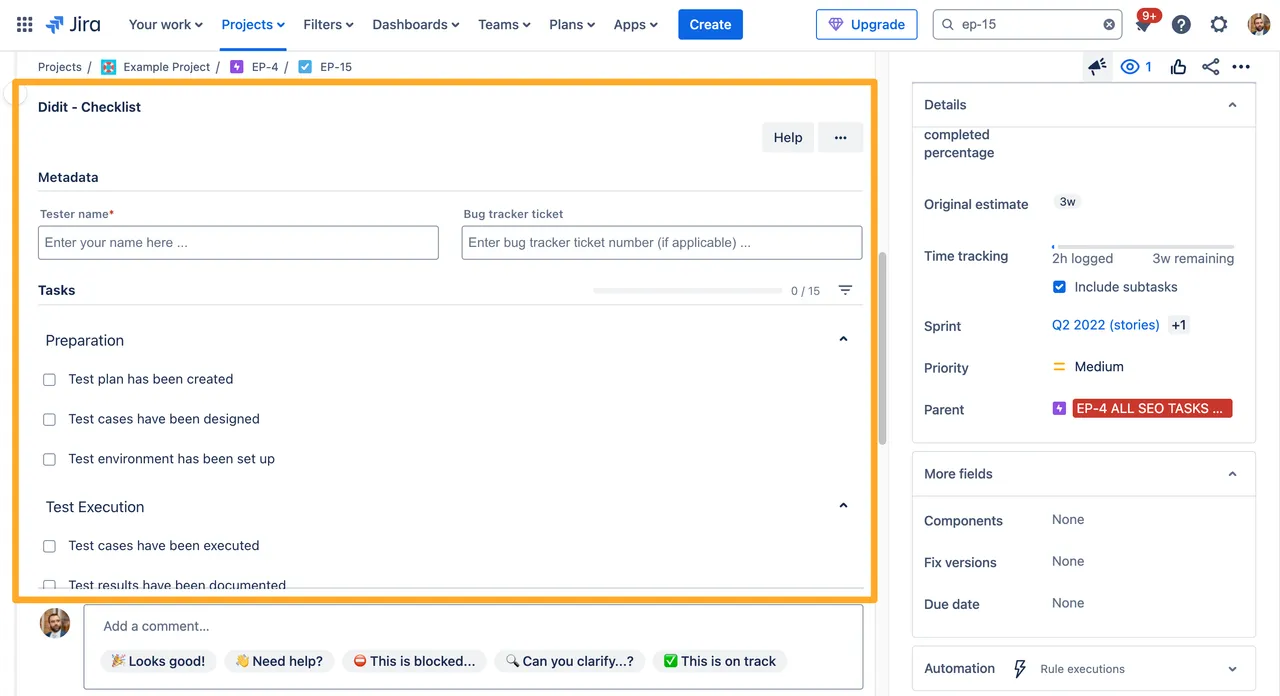
Find the Didit panel.
-
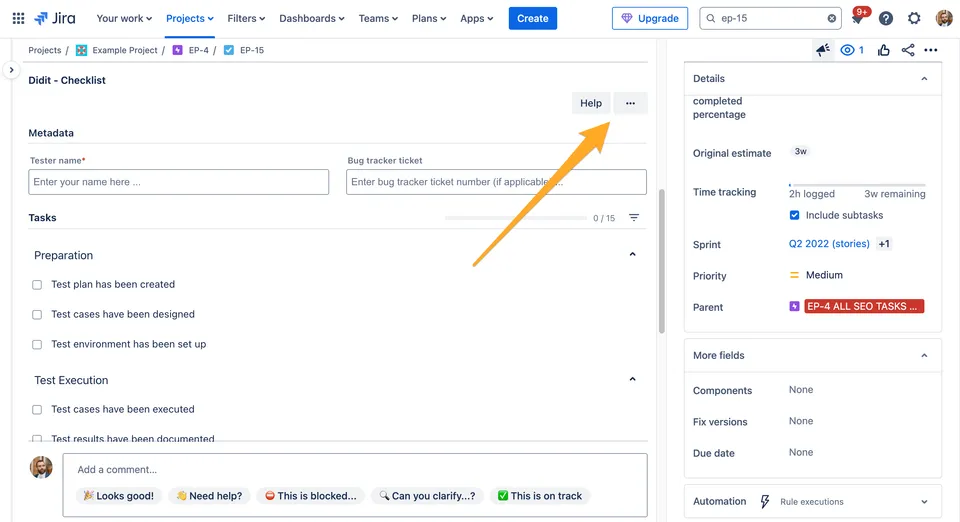
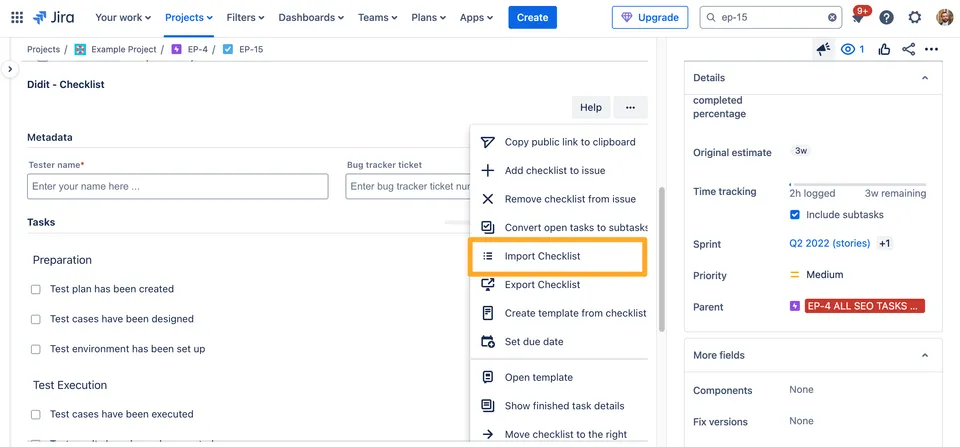
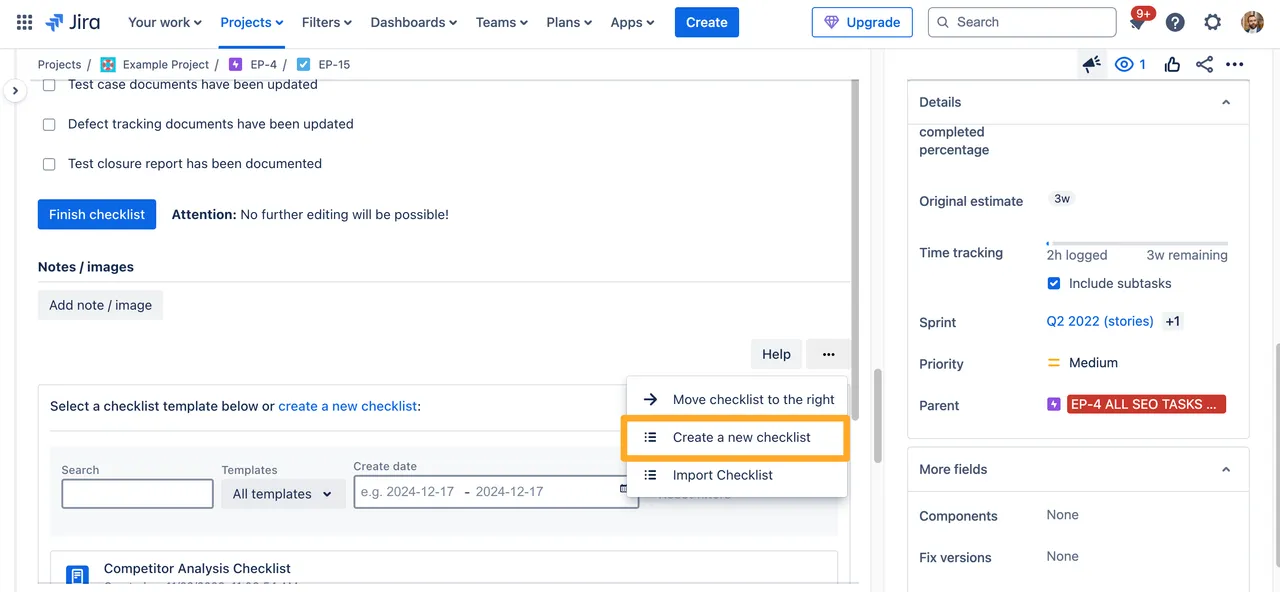
Click the ”…” button in the top right of the panel.
-
Choose “Import Checklist.”

-
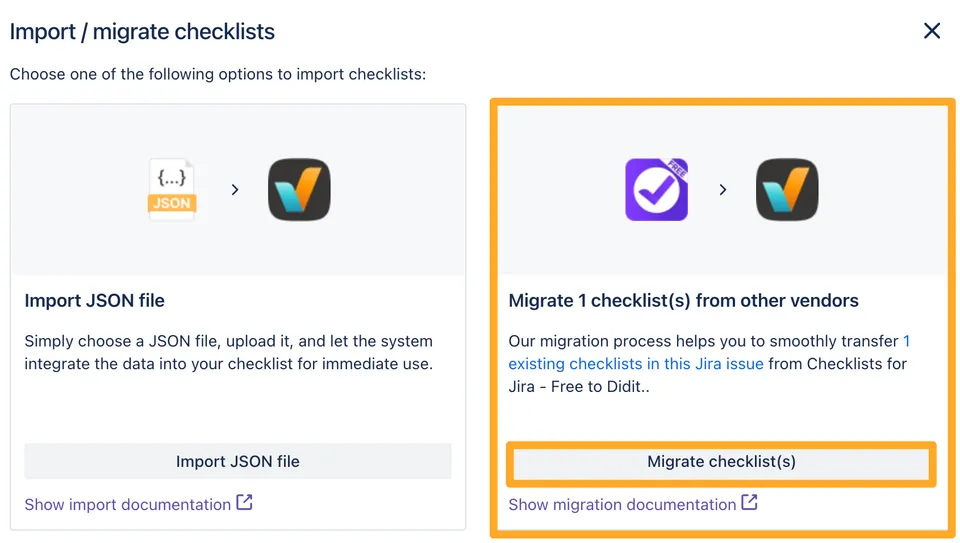
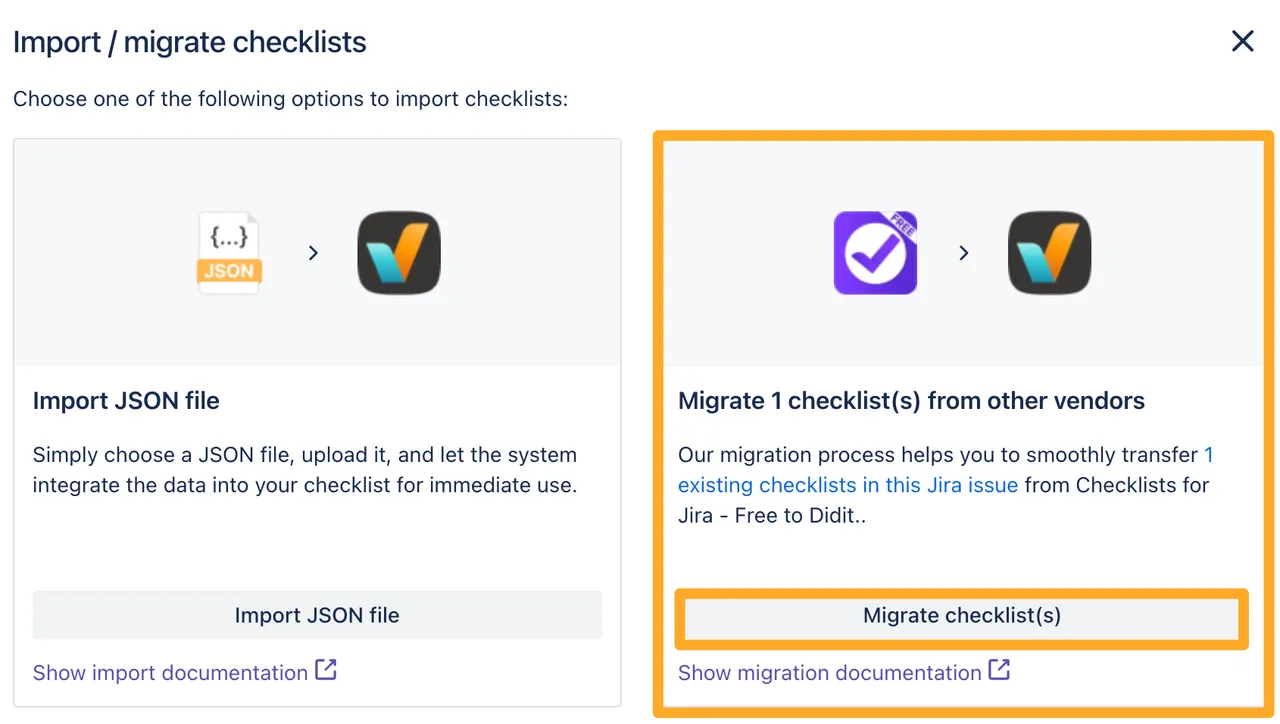
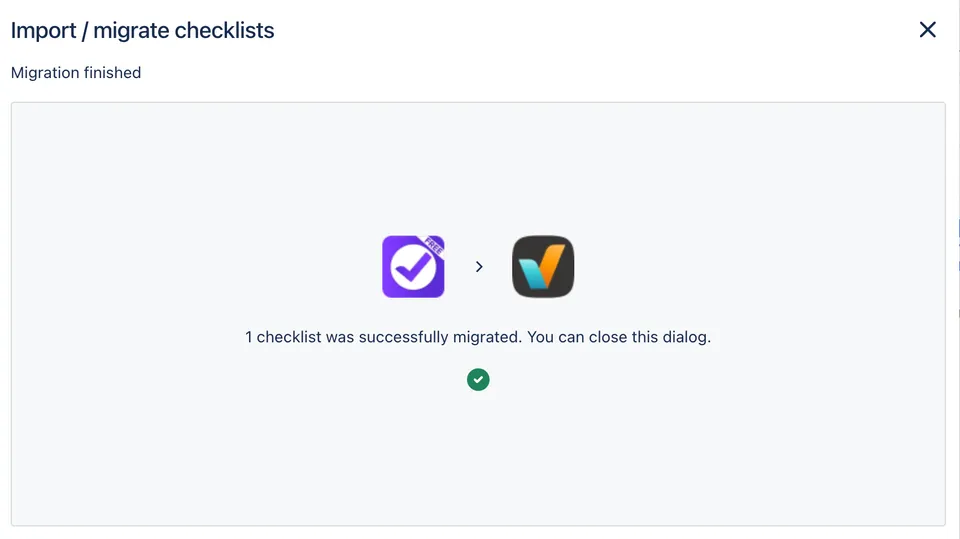
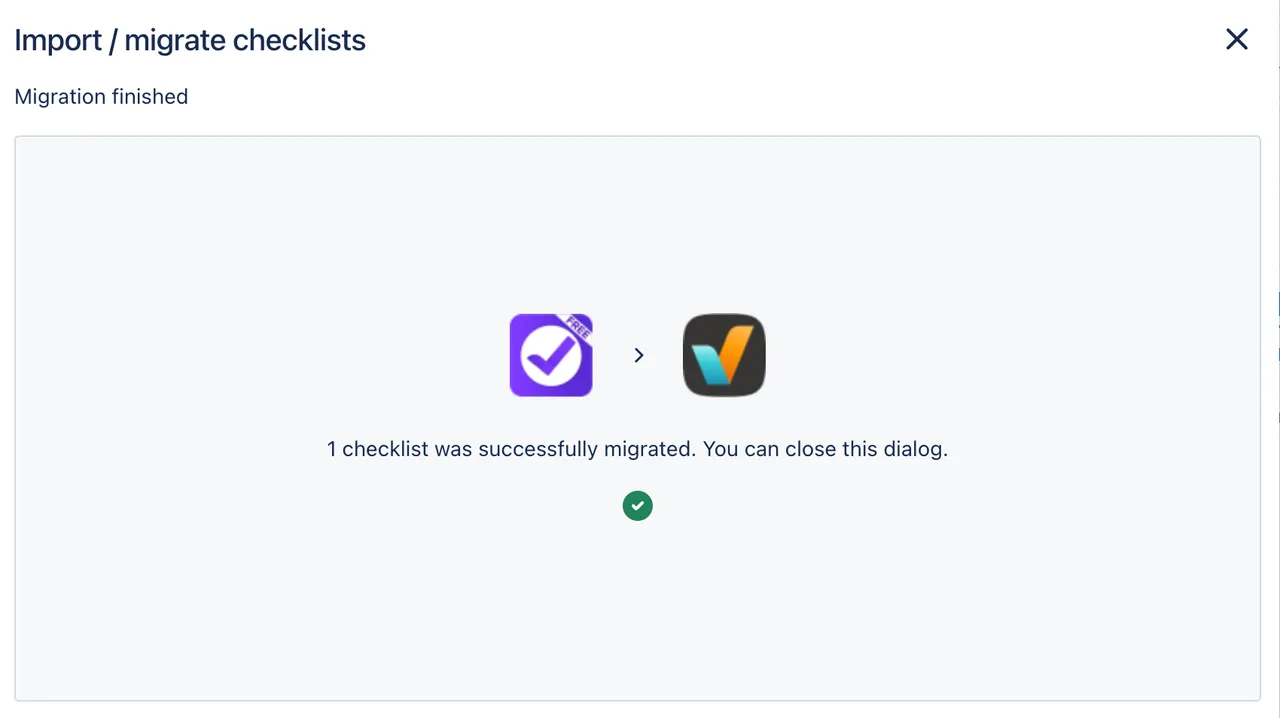
Choose migrate 1 checklist(s) from other vendors and click the “Migrate checklist(s)” button.
-
You will see a success message if your migration was successful. You can close the window.
Migration method 2 - Copy and paste each checklist
-
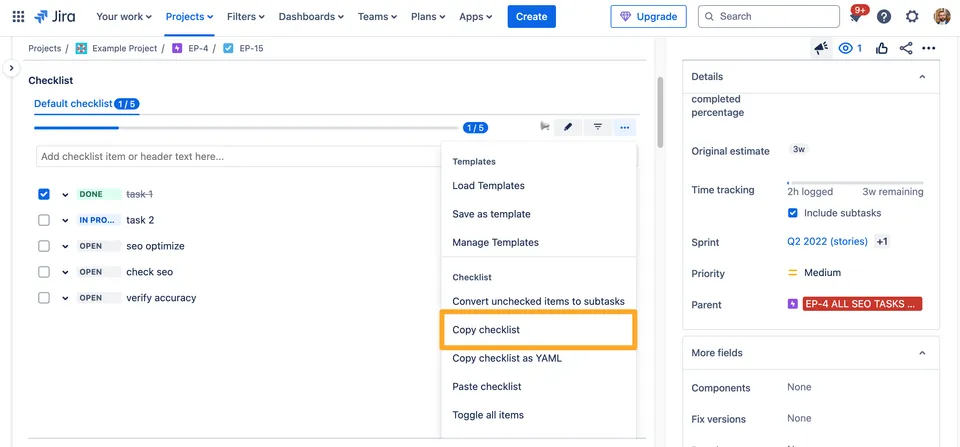
Find the the issue where you would like to copy the checklist from and locate the Checklist panel.
-
Click the ”…” menu in the top right of the panel.


-
Click “Copy checklist.”

-
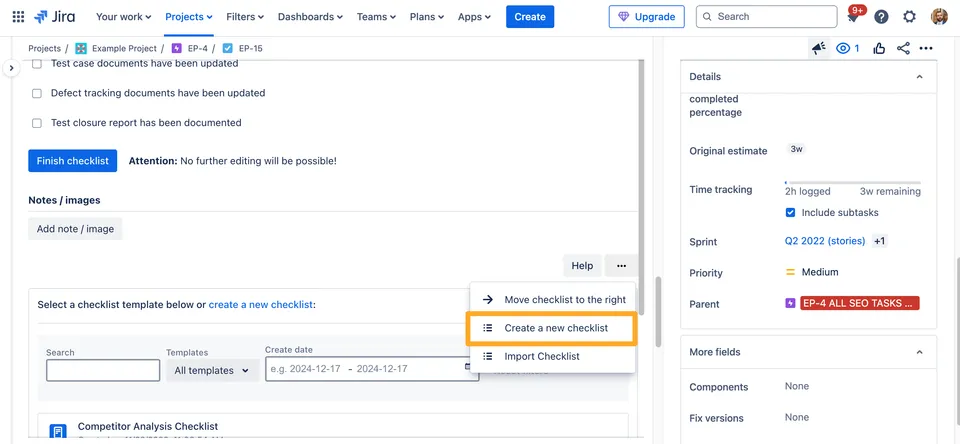
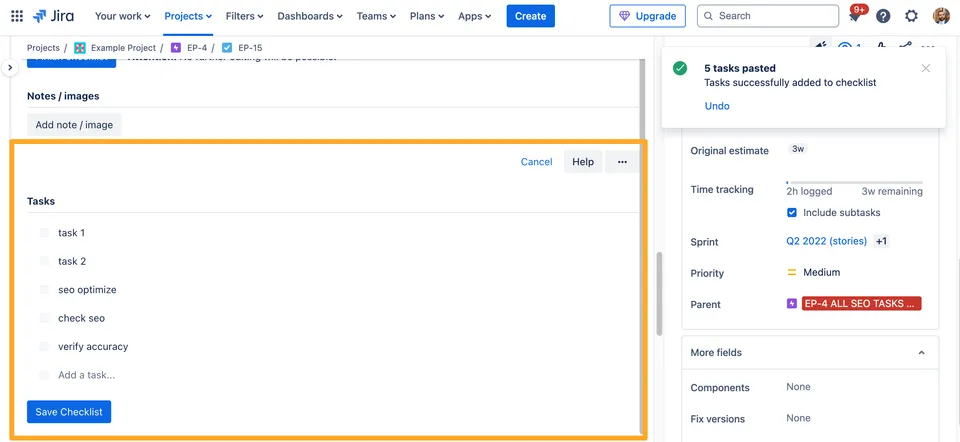
Create a new checklist in the Didit hub or Didit panel in your desired issue. You could also create a new checklist template in the Didit hub.
-
Paste the contents you copied from the Checklists for Jira app into your newly created checklist.

Checklist task status mapping
| Checklists for Jira Status | Didit task status |
|---|---|
| Open | To do |
| In progress | To do |
| Skipped | Skipped |
| Done | Completed |
Link to this page: https://seibert.biz/migratechecklistsforjiraindividual