On this page:

How to fill out a checklist in Atlassian Jira
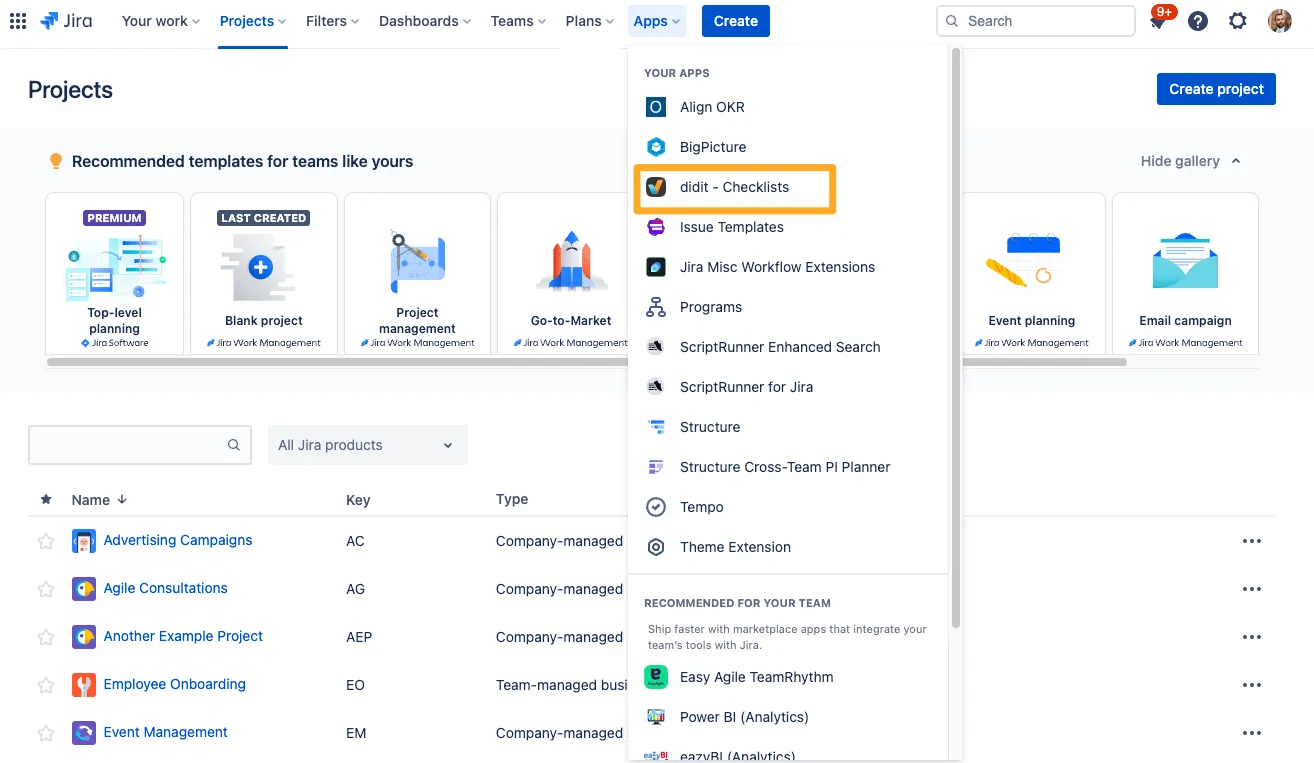
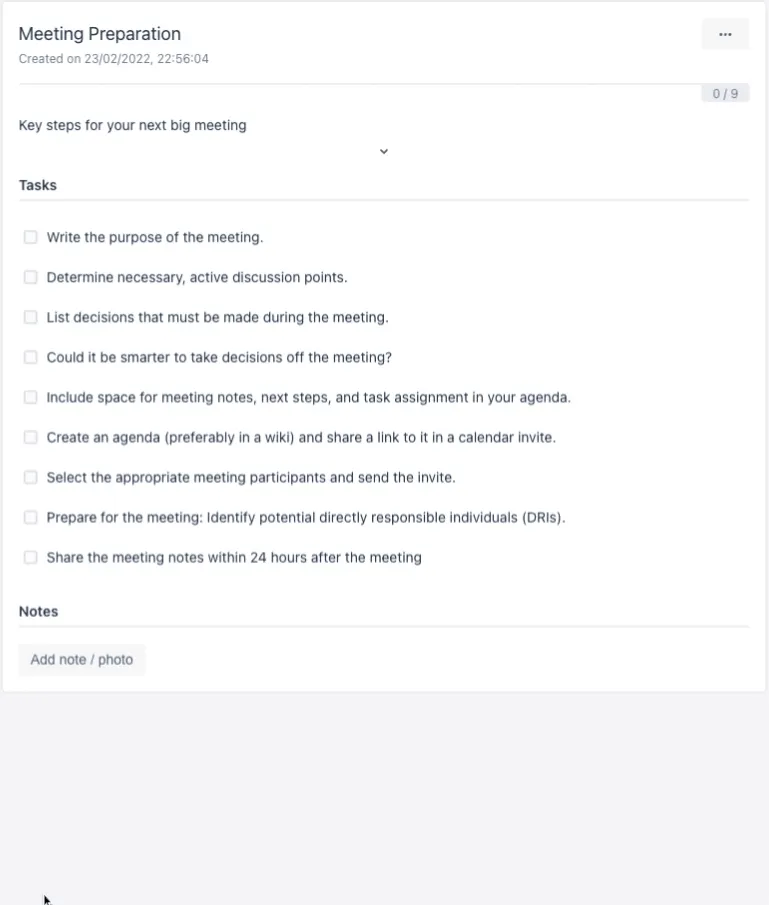
  1. Jira project list with the apps menu open and the Didit checklists option highlighted.
    Jira project list with the apps menu open and the Didit checklists option highlighted.
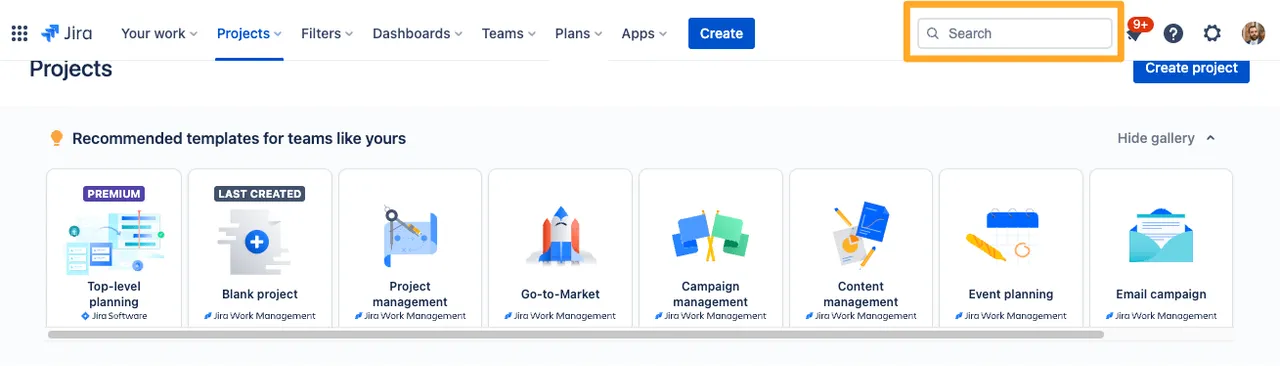
  2. If your Checklist is in an issue you can search for it using the search box in Jira.

    Jira iwth the search bar highlighted in the top right.
    Jira iwth the search bar highlighted in the top right.
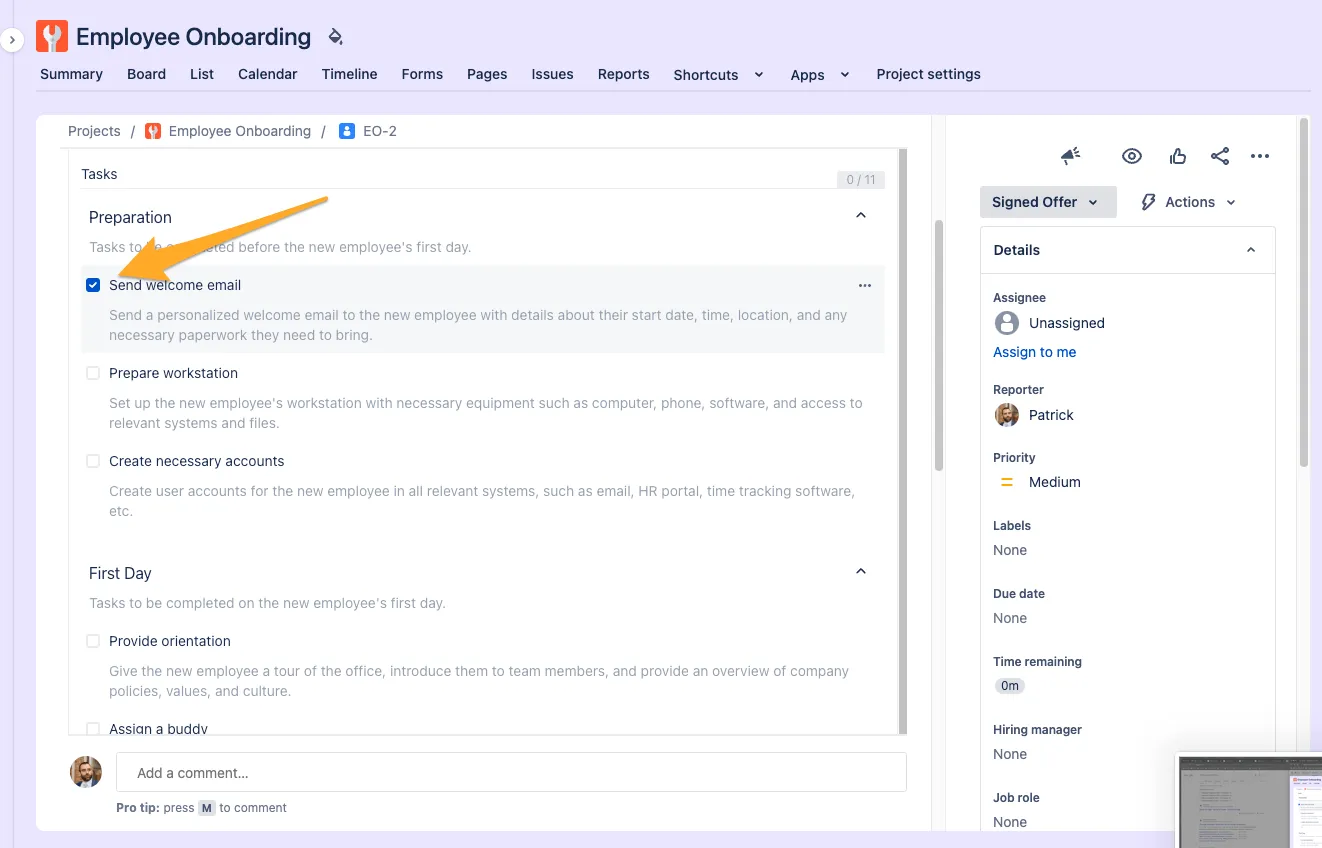
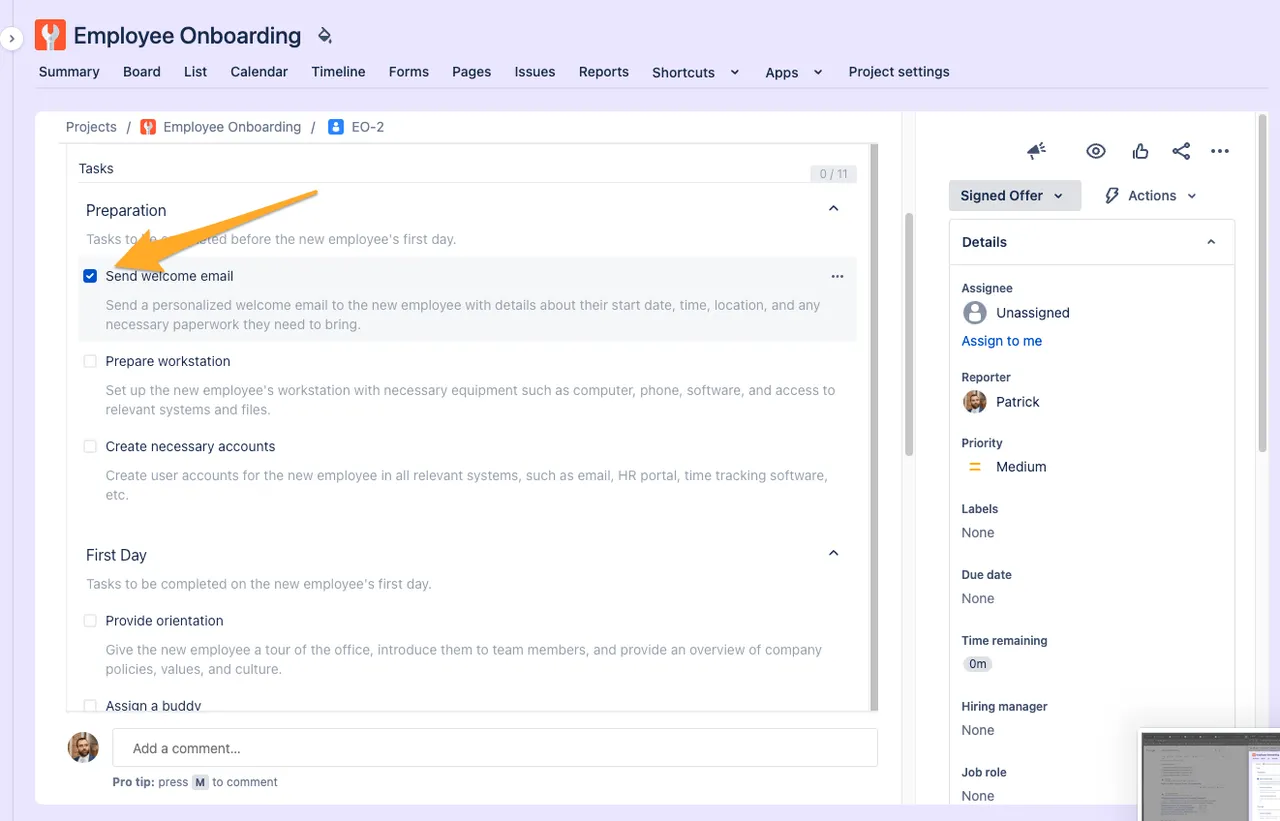
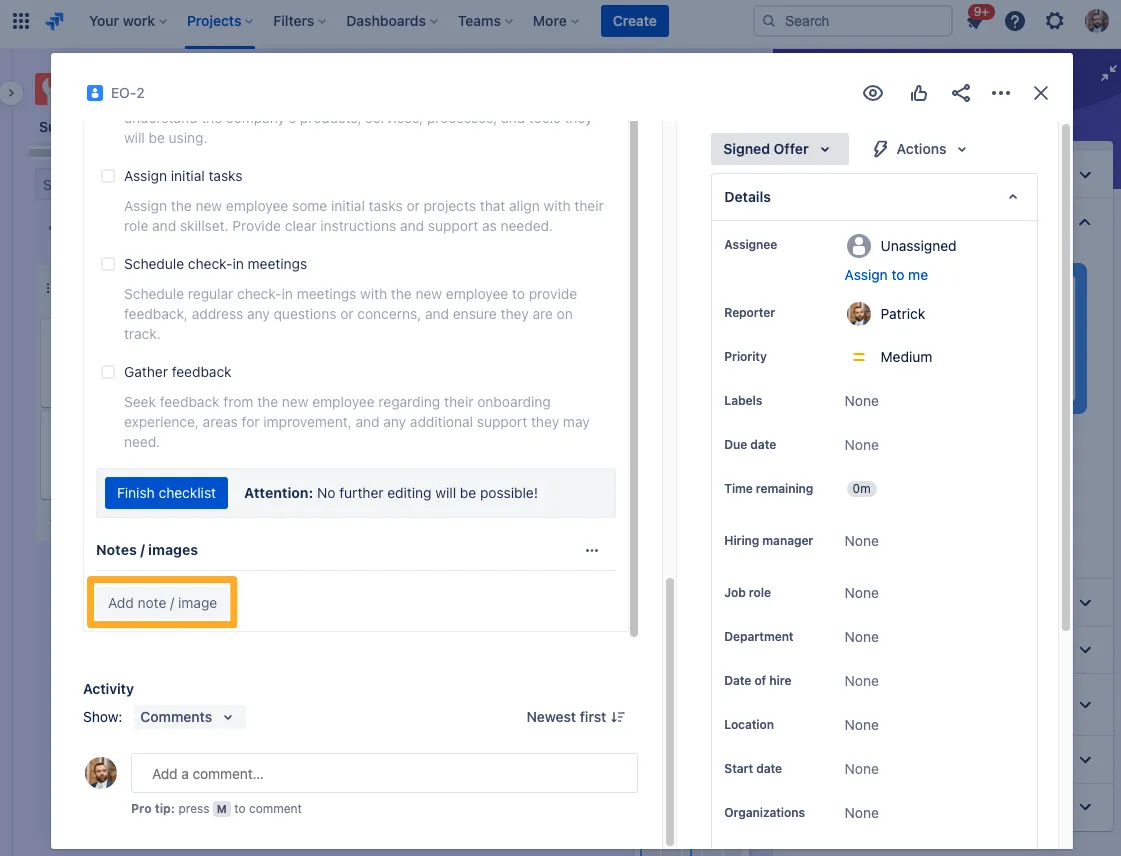
  3. To complete the Checklist, select the items in the Checklist that you would like to mark as complete.

    A Jira issue with the Didit panel open and an arrow to a checked task.
    A Jira issue with the Didit panel open and an arrow to a checked task.
  4. You can add notes and images with the “Add note / image” button at the bottom.

    A didit checklist in a jira issue with the Add note / image button highlighted.
    A didit checklist in a jira issue with the Add note / image button highlighted.
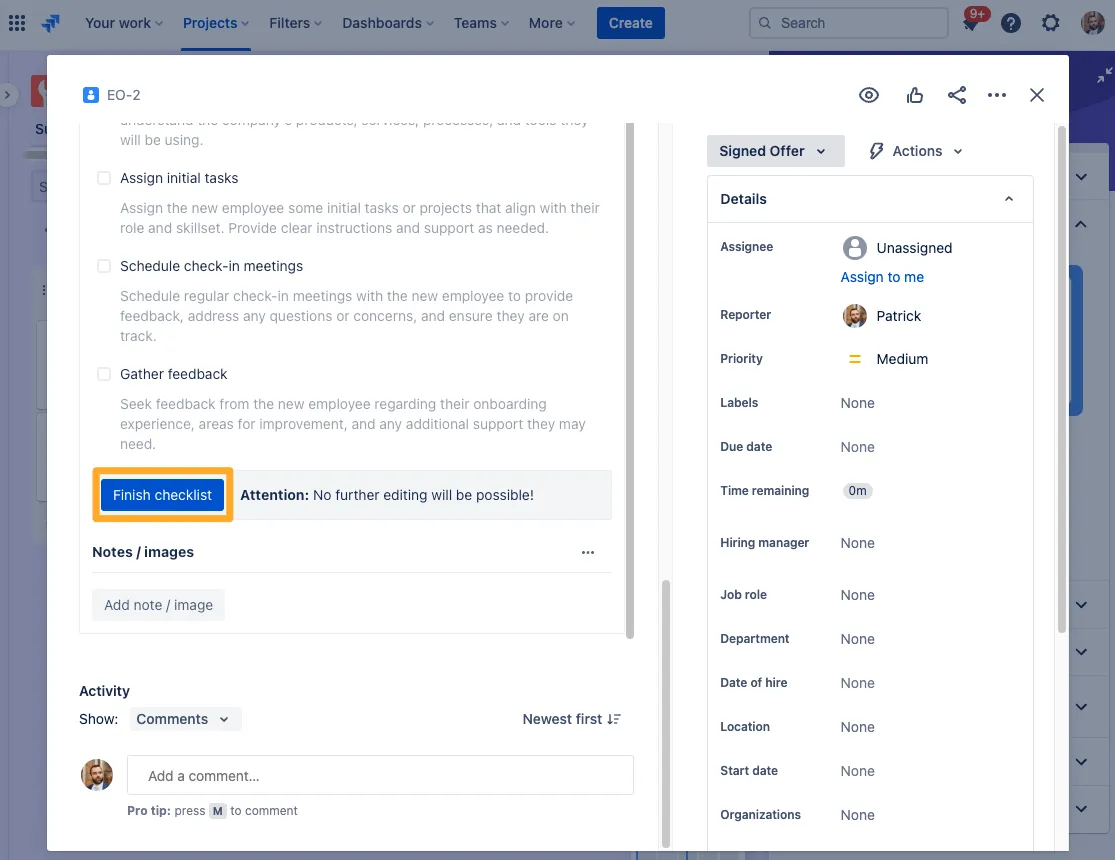
  5. Once you are done, click the blue “Finish checklist” button.

    A didit checklist in a jira issue with the finish checklist button highlighted.
    A didit checklist in a jira issue with the finish checklist button highlighted.
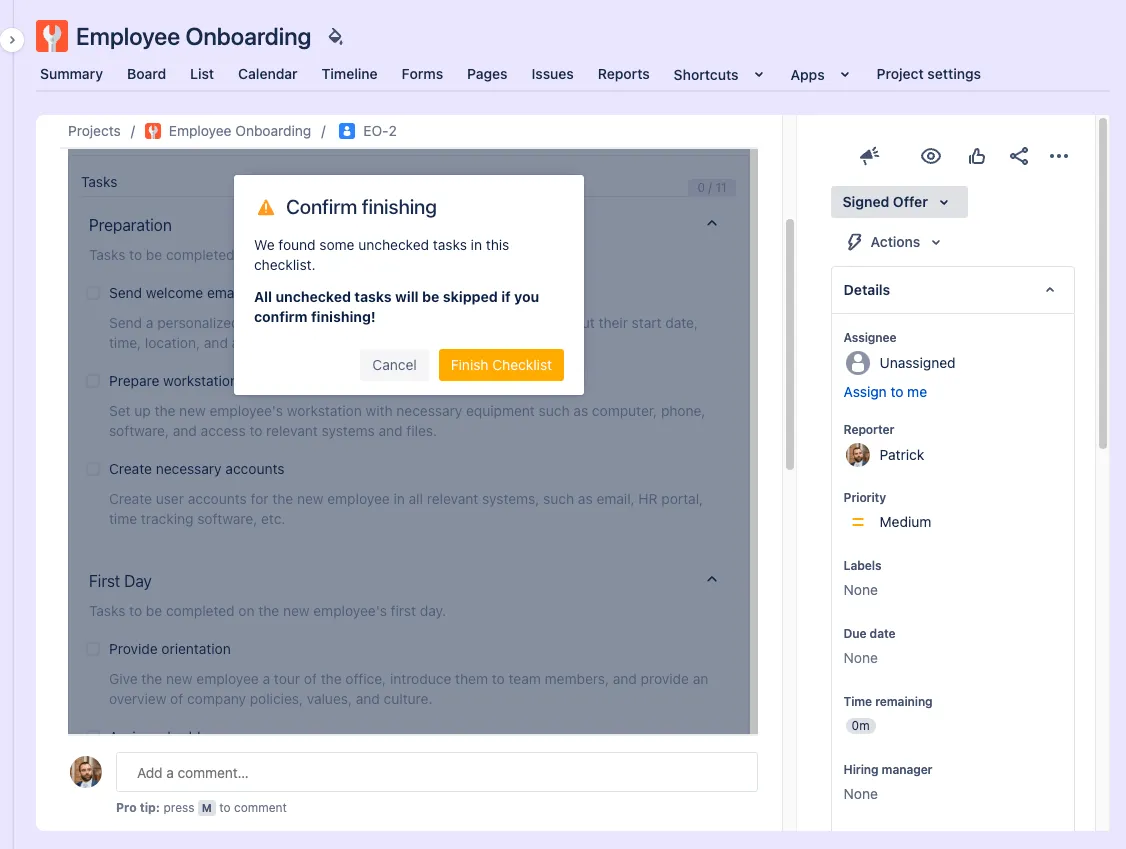
  6. If you leave some items unchecked, Didit will warn you before you can finish the Checklist.

    The confirmation screen if some checklist tasks are left unchecked when finishing a checklist.
    The confirmation screen if some checklist tasks are left unchecked when finishing a checklist.
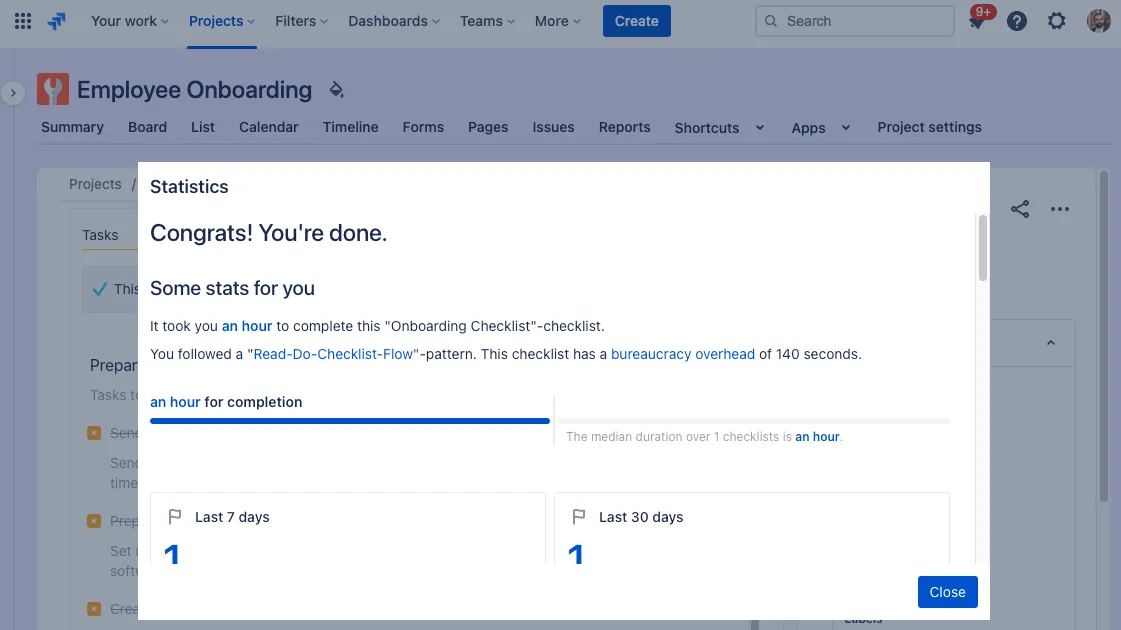
  7. In the end, Didit will give you some data about your Checklist.

    The checklist statistics after finishing a Didit checklist.
    The checklist statistics after finishing a Didit checklist.

Here is a GIF that shows the whole flow

The whole process of filling out a checklist.

Link to this page: https://seibert.biz/checklistsfilloutchecklist