Jira checklists for software developments teams and projects
In software development, defining what ‘done’ means and setting clear acceptance criteria are essential for ensuring that development teams understand and deliver on product requirements. Didit Checklists for Jira is the perfect tool to incorporate these definitions directly into your Jira issues, reducing the need for manual tracking and comments.
Complete implementation guide
In this guide, we will lay out how you can implement Didit checklists into your software team or project. There are a number of different features that you can take advantage of to improve your development processes and ensure the delivery of quality products to your customers.
Initial setup & configuration
Before you start working or start your project, it’s important to define your processes and what you would like to get done. In this initial section we will explore a few of the items that you should get set up before starting your project.
1. Checklist creation
For any of your key checklist ideas, you should start with creating those checklists. There are a number of ways that you can do that with Didit, but in order to start using the tool, you should have some ideas for things you want to use checklists for. These can be
- Definition of done
- Acceptance criteria
- Testing steps
- Automation testing runs
If you find yourself here, you are probably already using checklists in some capacity and just need to make them digital or implement them in Jira and Confluence. If that is the case, you have a few options, but you should make these checklists templates in Didit to unleash our complete feature capabilities.
- Copy and paste the already existing checklists
- Create a checklist template in the Didit hub from scratch
- Create an ad-hoc checklist in a Jira issue then convert it to a template
If you know you need to start using checklists but haven’t quite decided how you are going to use them or what your checklist tasks may be, you could consider using our checklist generator which is built into the Didit hub. You can start by searching key words about the checklists you would like to create and then save some of the built in checklists we have available.
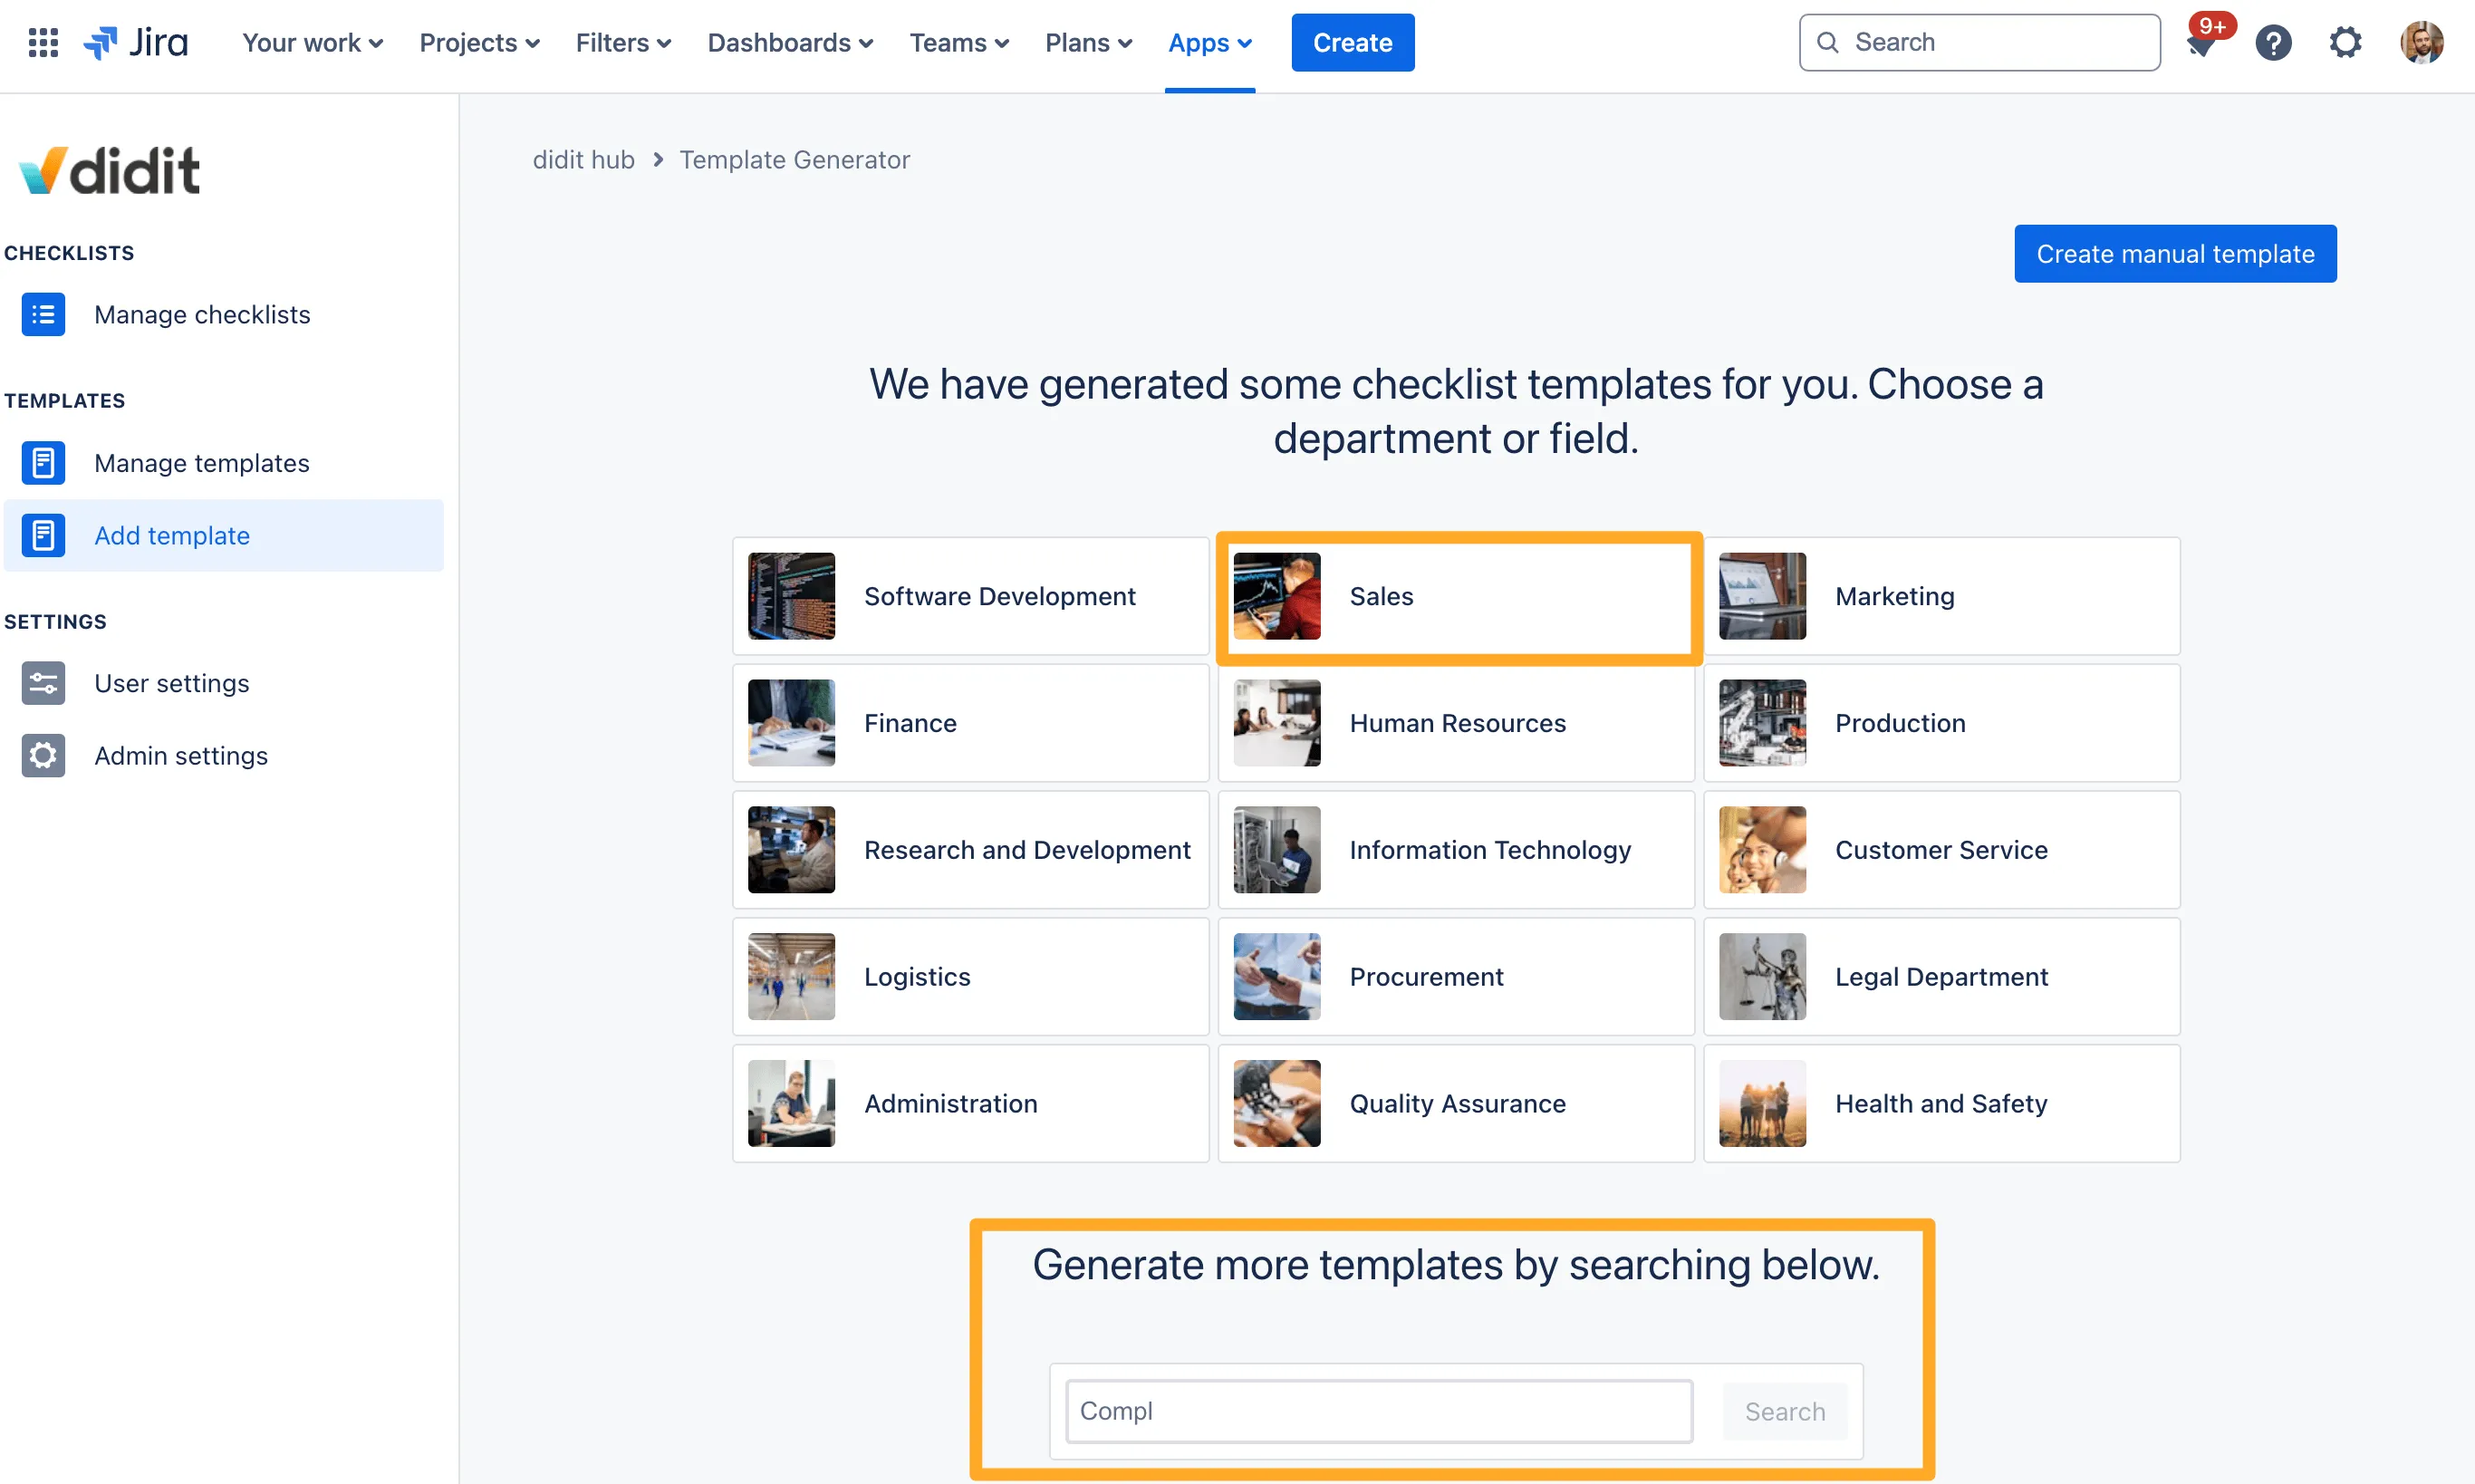
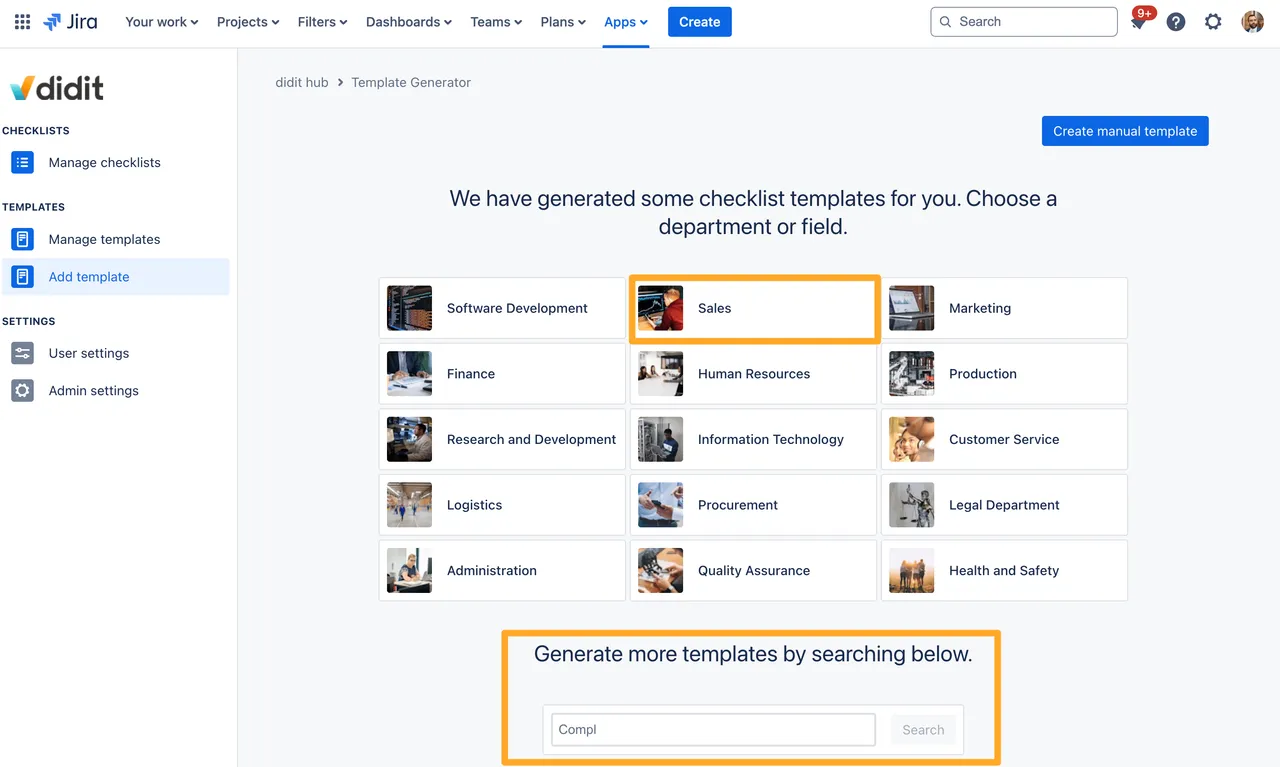
From there, you can edit these templates to fit your team’s exact needs.
2. Project settings configuration
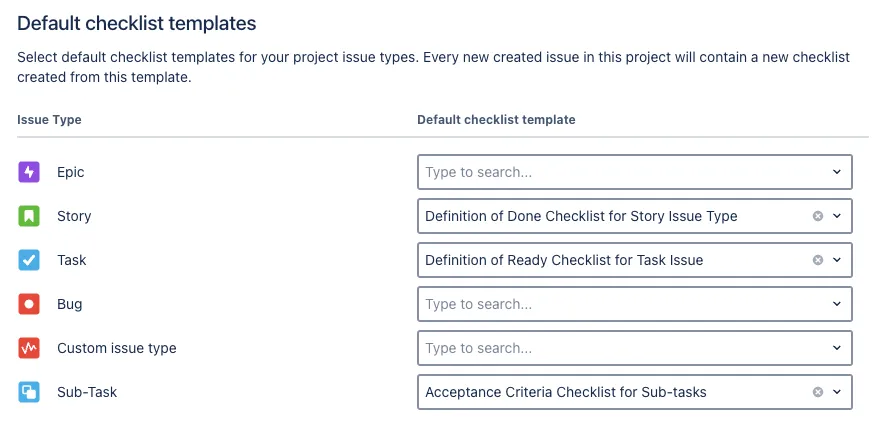
Next, within your software project that you are using in Jira, you will want to decide which checklist templates map to which Jira issues. An example of this is shown below:
- Story —> Definition of done template
- Sub-task —> Acceptance criteria template
- Bug —> Bug resolution and troubleshooting checklist templates
- Epic —> Epic planning and validation templates
- Task —> Definition of ready checklist template
Within your Jira project settings, you can set a default checklist per issue type. So no matter what the other content is in that issue, when someone creates it, the default checklist will be attached.

If you are not set on these checklists for each issue type don’t worry, you can still add more checklists to an issue as it advances through your workflow.
Visibilty into checklists and mechanics
3. Setup board and custom fields
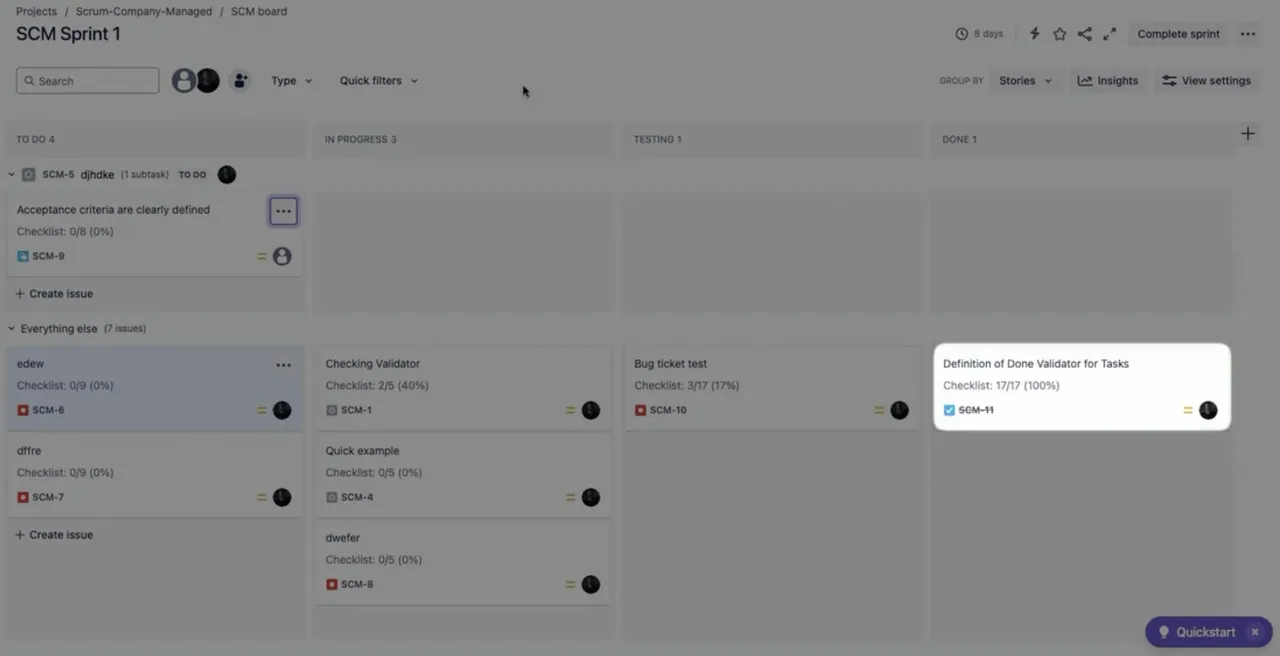
Now that you have your default checklists setup, you will want to give visibility into the checklist related custom fields on the board and within the issue view.
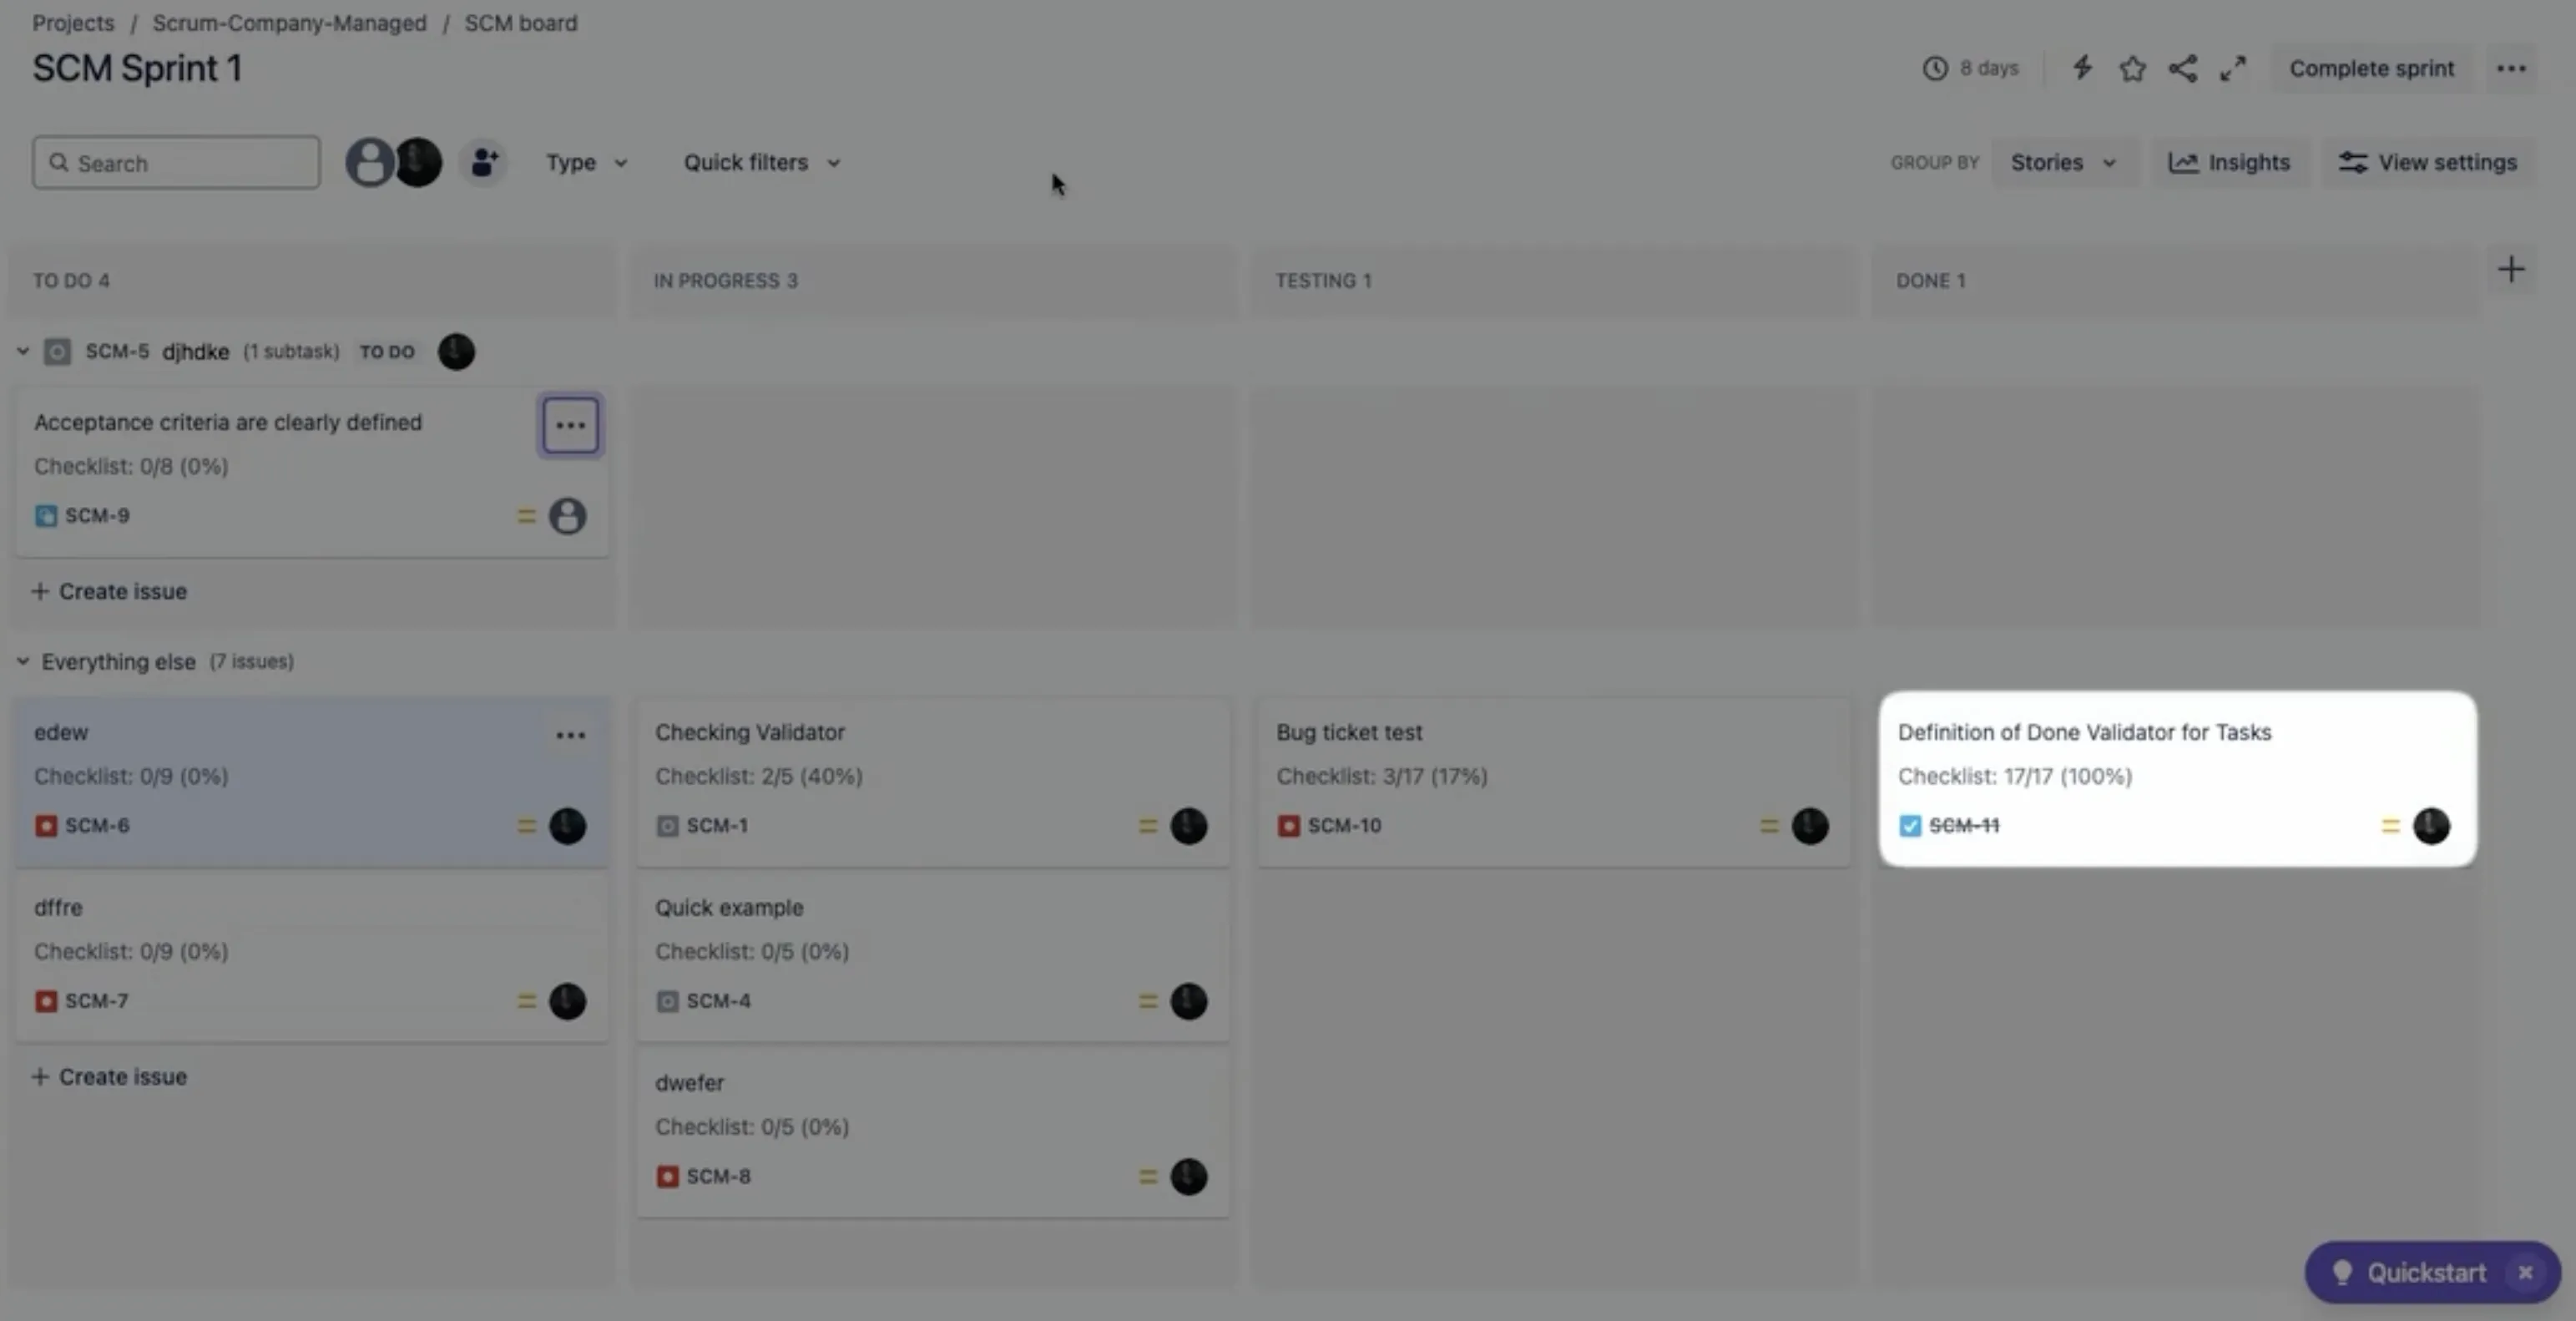
In order to give visibility into the checklist progress on the board view, you should make the “Didit tasks completed percentage” or the “Checklist completion percentage” field visible on the card settings. This will help product owners and managers get a quick view into checklist progress without having to click into each issue.
If you also want to give visibility to users of various Didit related fields on the issue view, you can add the fields as needed. Since Jira company-managed projects have three screens, create, view, and edit, it is recommended to only add these fields to the view screen so that the data is not changed.
Advanced configurations
4. Setup workflow validators and post functions
Permission to edit workflows
Depending on which type of project you are using and what your permissions are, you may need help from your Jira admin to configure the Didit workflow functions.
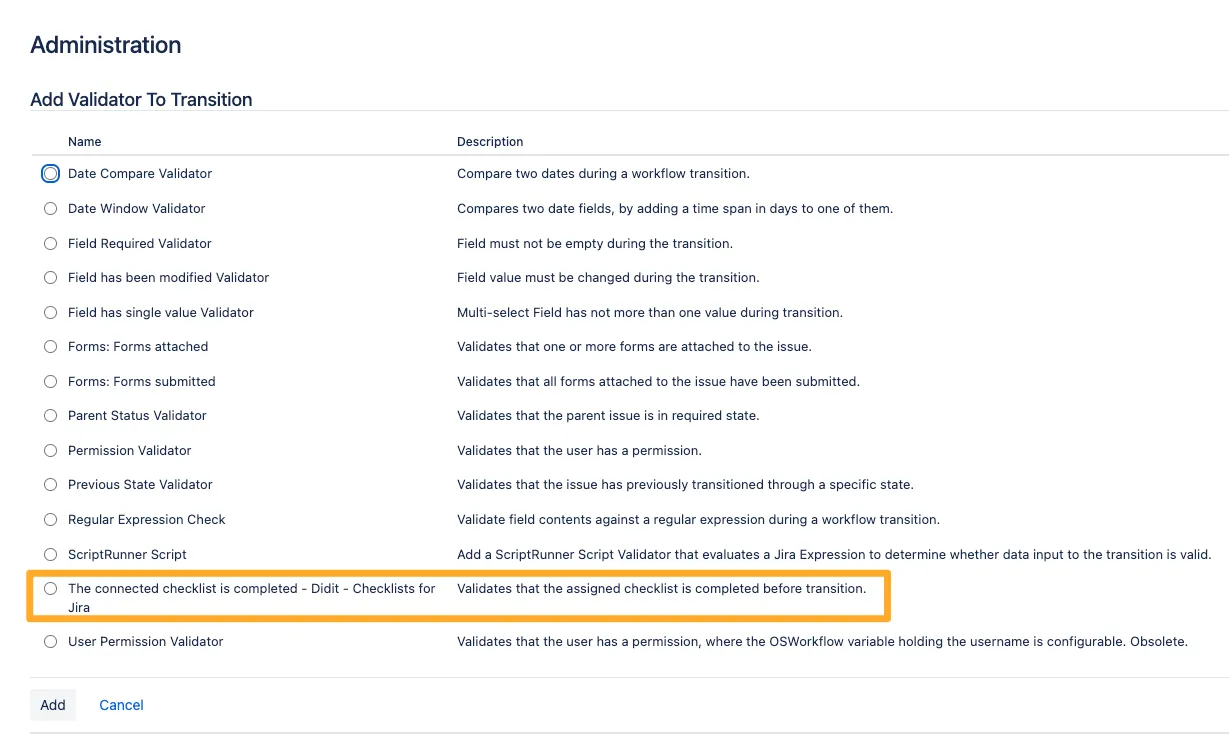
If you want to make sure that all checklists are completed when an issue transitions to a certain status, such as “Done.” You can use a Didit workflow validator to ensure all tasks are completed. This works well for an agile team who needs to meet a specific and team-agreed-upon “definition of done” before releasing that functionality to the customer.

In addition to this, if you have an Epic that needs to be prepared for development, you could use a validator to ensure the Epic has all its necessary components before entering the “In progress” status.
From a quality standpoint, you can ensure that all checklist items in your QA checklist are done before an issue is moved to done. If your team has specific automation tests, regression tests, or test steps that need to be followed, a validator can ensure they are done.
If team members occasionally forget to mark off all their tasks, when an issue transitions to a new status, you could consider using our built in post function which will automatically complete or skip all open tasks on a transition. The post functions are mostly useful if you want to automatically complete checklists.


5. Configure automation rules as desired
There are times where you may want to add a checklist to an issue after the issue is created. For example, you may want to add the QA testing checklist when the issue transitions to your “In Test” status (or whichever status your team uses to indicate testing). To do that, you can use an automation rule and some simple JSON if you want a checklist template or markdown if you’d like an ad-hoc checklist. If you are having trouble creating the property value for an automation rule you can use our automation wizard.
Maybe you want to blend both methods of adding a checklist to an issue. You might want a default checklist per issue type, like acceptance criteria and definition of done, and you’d like to add a checklist at another poitn in the workflow, like a testing checklist when your issue transitions to the testing status. For this case, you can add multiple checklists to one Jira issue. If you would like to do this with automation, you will need to apend the JSON slightly from the above recommendation. Instead of “replace” for the merge value you would choose “add.”
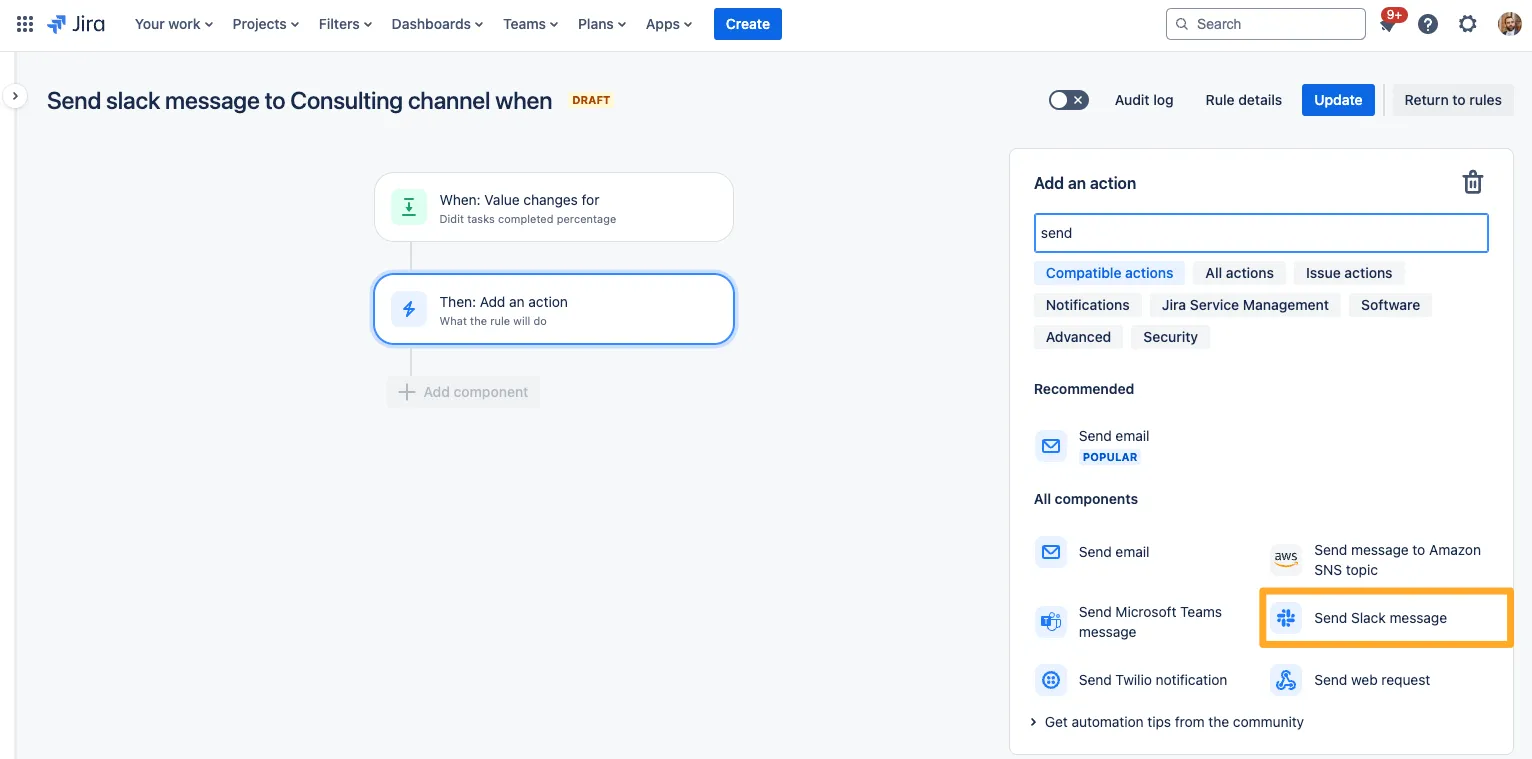
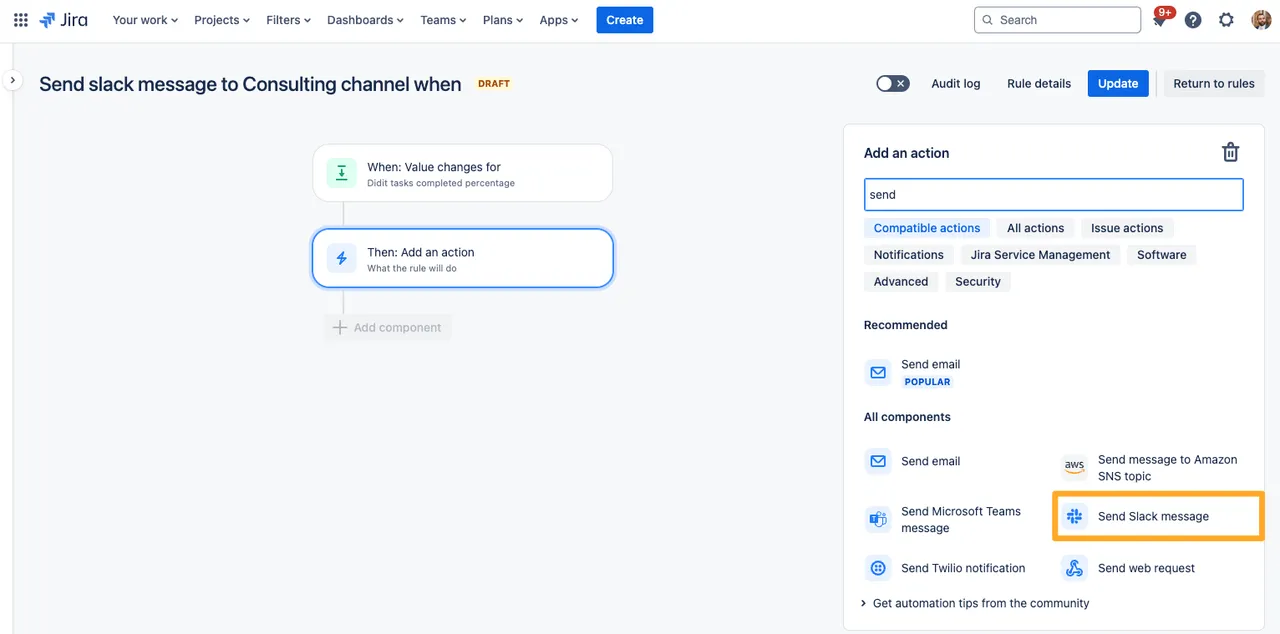
Another advanced configuration you could decide to add to your software project is sending a message when a checklist is completed or updated. If you wanted an update anytime a checklist is updated, you could use the mentioned trigger but without a condition for the percent complete. If you wanted to only get a message when a checklist is complete, you would just add a condition for when the Didit checklist task completion percentage field is equal to 100.
With Didit checklist’s custom fields and automation for Jira, the possibilities for automation and other advanced configurations in your project are endless. Check out our other automation rules and see if you can come up with any on your own.
6. Document completed checklists in Confluence
For compliance and record-keeping, Didit integrates with Confluence, allowing you to copy the checklist URL from Jira and paste it directly into a Confluence page. The checklist will display as a macro, preserving the completed checklist for future reference on Confluence. Didit is the only app on the marketplace to provide a real-time sync between Jira and Confluence for its checklists.
Our Product Owner, Dominic, would love to give you a personalized demo to showcase cool configurations like this and more for your software development projects on Jira.
Get in touch
Contact us now to talk about your checklist needs for software development.
Schedule a call with us via Calendly or provide your email address, and we'll get in touch with you.

Dominic Spike
Didit Product Owner
Link to this page: https://seibert.biz/diditsoftwaredevusecase