Finding the app and its hub - Didit - Checklists for Atlassian Jira and Confluence
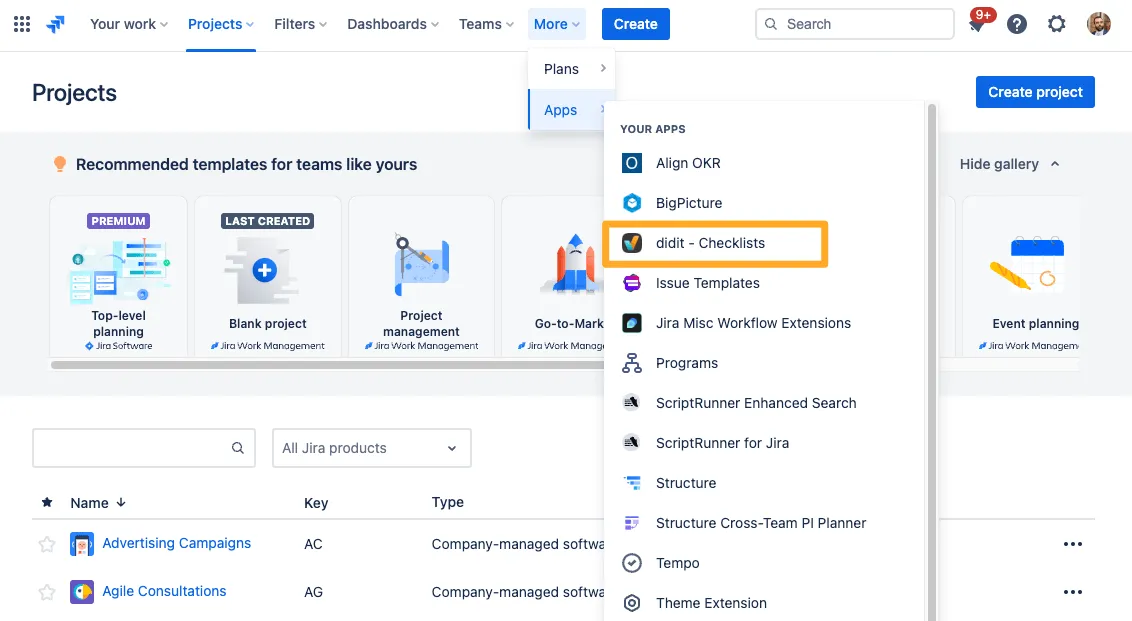
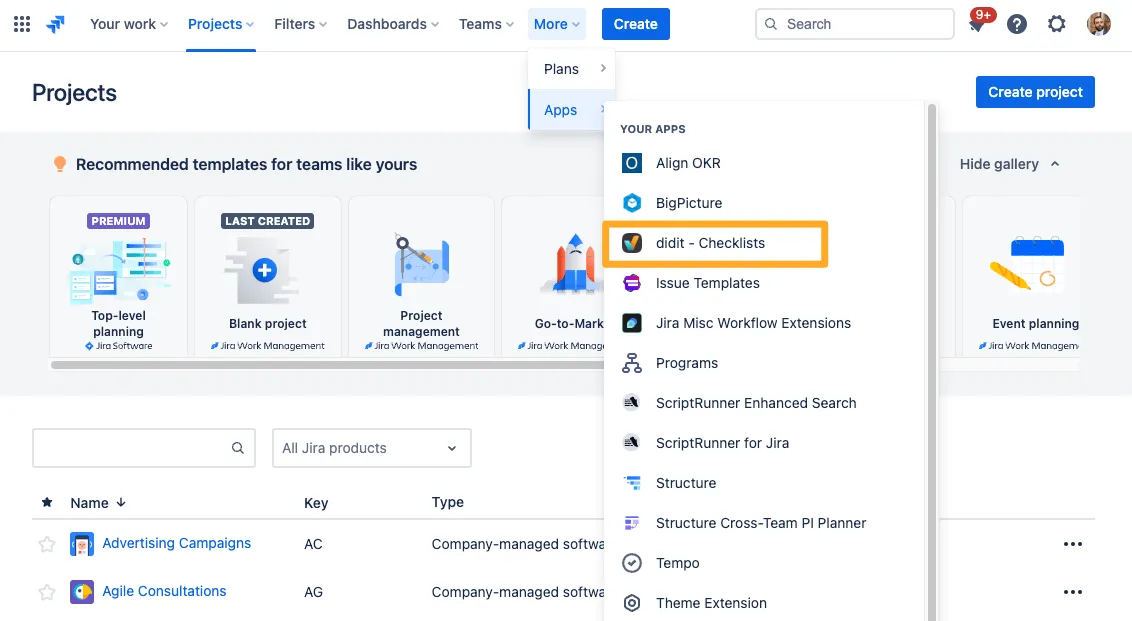
Once you have successfully installed the app it should appear in your “Apps” dropdown menu. Simply click on “Didit - Checklists” and you will be directed straight to your Didit hub from where you can manage all your templates and checklists. The URL of the Didit hub is “https://yourdomain.atlassian.net/wiki/plugins/servlet/ac/checklists/checklist-overview” for Confluence and “https://yourdomain.atlassian.net/plugins/servlet/ac/checklists-jira/checklist-overview ” for Jira.


If you do not see the checklist icon under “Apps” you may have to add the checklist app via the marketplace. Here it is for Jira and for Confluence. If you still do not see the checklist icon under “Apps” your administrator may have restricted access to the Didit- Checklist hub. Please ask your administrator to add you to the access group.
The Didit - Checklist hub
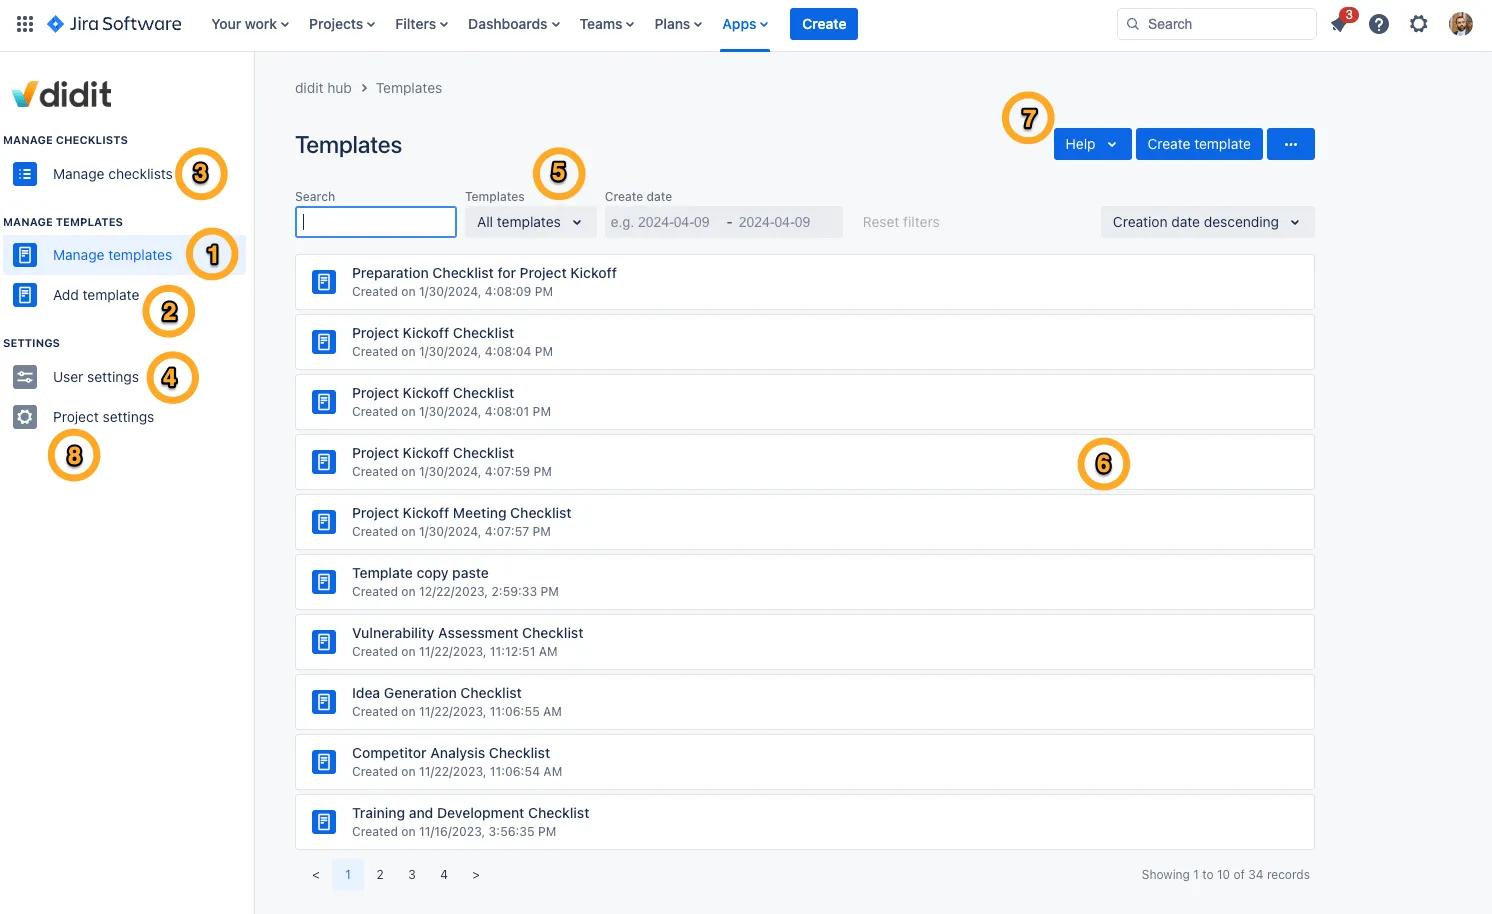
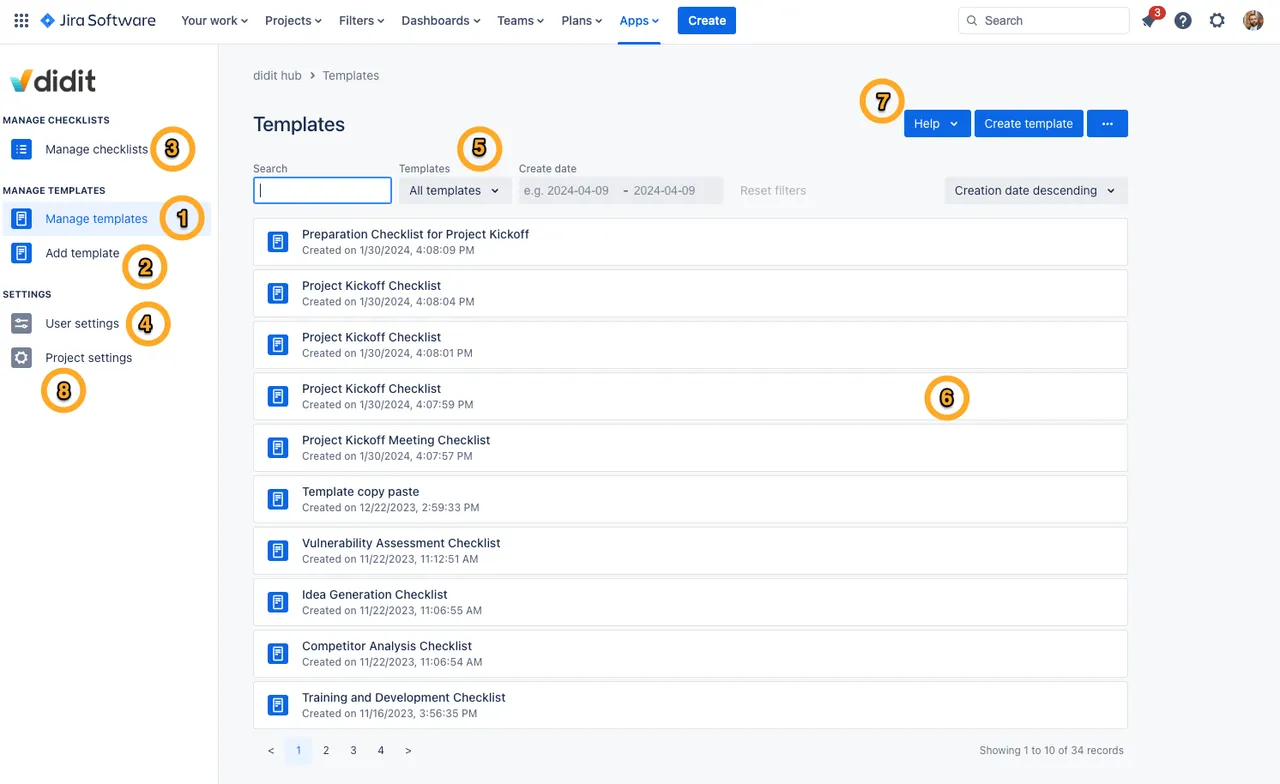
After completing the on-boarding process of Didit - Checklists, your first entry point will always be the Didit hub. Here, you can create, edit, share, and generally manage all your checklists and templates. Let’s have a look at the Didit hub interface and how to navigate through it.


-
Manage templates: By default you will always be directed to your list of templates. Here you can create new templates or create checklists from them.
-
Add template: Powered by the force of AI, our checklist generator offers a helping hand in the creation process. The generator also serves as an on-boarding and replacement of the previous “Checklist Examples” feature. It allows you to create customized checklists in the blink of an eye.
-
Manage checklists: Here, you will find an overview of all checklists - no matter if they were generated from a template, a Confluence page, a Jira Issue, a public link, or a QR Code.
-
User settings: This section allows users to choose the default display behavior of completed and skipped tasks in all checklists across your projects. It also allows you to sign up for focus groups to participate in our user research.
-
Filter: In this area you can filter your templates and checklists. You can choose from “All templates,” “My templates” and “Favorite Templates.” Additionally you can set a creation date and have them displayed sorted by title or creation date.
-
List of templates/checklists: You can find the complete list of your templates and checklists in this section. As soon as you hover over one template/checklist, additional options will appear as icons on the right.
-
Menu: This is the shortcut to your template and checklist creation as well as your support station. The dropdown “Help” button offers you many options to get in touch with us, whether you want to report a bug or have a nice chat with us. The meatballs menu reveals our import feature.
-
Project settings: If you are a Jira administrator, you can click here to access the global visibility settings for each project on the entire site.
Link to this page: https://seibert.biz/checklistsadminarea